

Before you start
- You need permission to create tools. See APIs & MCPs.
- Your endpoint must be reachable from the internet over HTTPS.
- If the API needs a key or password, store it first as a secret.
Create an API request
1
Start a new tool
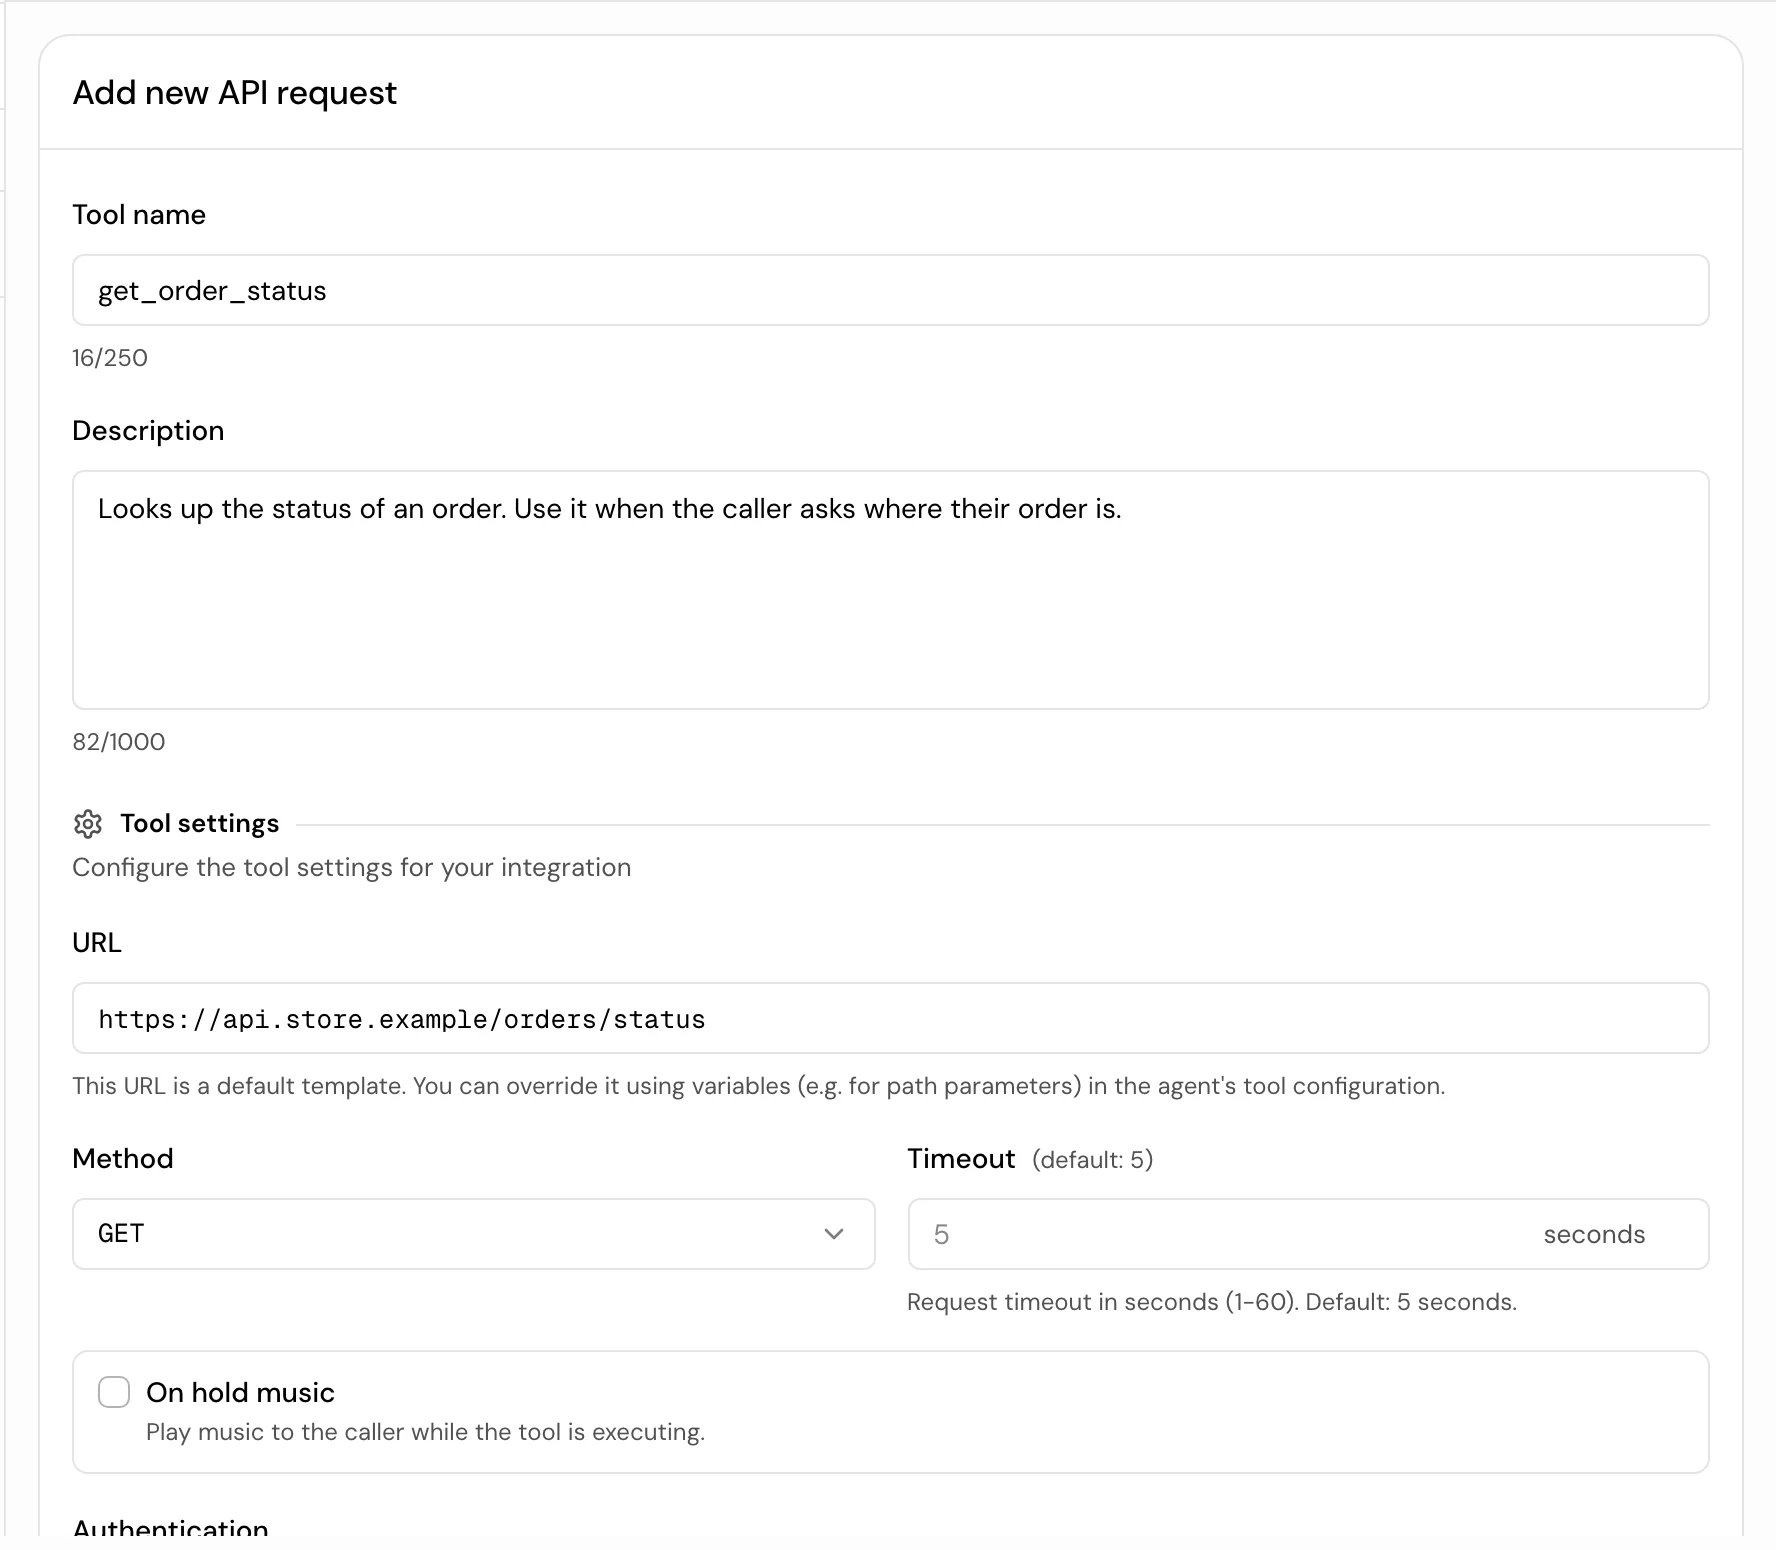
Open APIs & MCPs, click Add new tool and choose API request. The form Add new API request opens.
2
Name and describe it
Enter a Tool name and a Description. Write the description for the agent: what the tool does and when to use it, for example “Looks up the status of an order. Use it when the caller asks where their order is.”
3
Set the request
Under Tool settings, enter the URL, pick the Method, and set Authentication and Headers if your API needs them.
4
Define the parameters
Under Function configuration, add the Parameters the agent should send, with a clear description for each.
5
Save and test
Click Create, then open the tool and click Test to send a sample request.
Settings
Header names can contain letters, numbers, hyphens and underscores, and must be unique. Headers that browsers forbid (such as
Cookie, Host, User-Agent or Content-Length) are refused.
Authentication
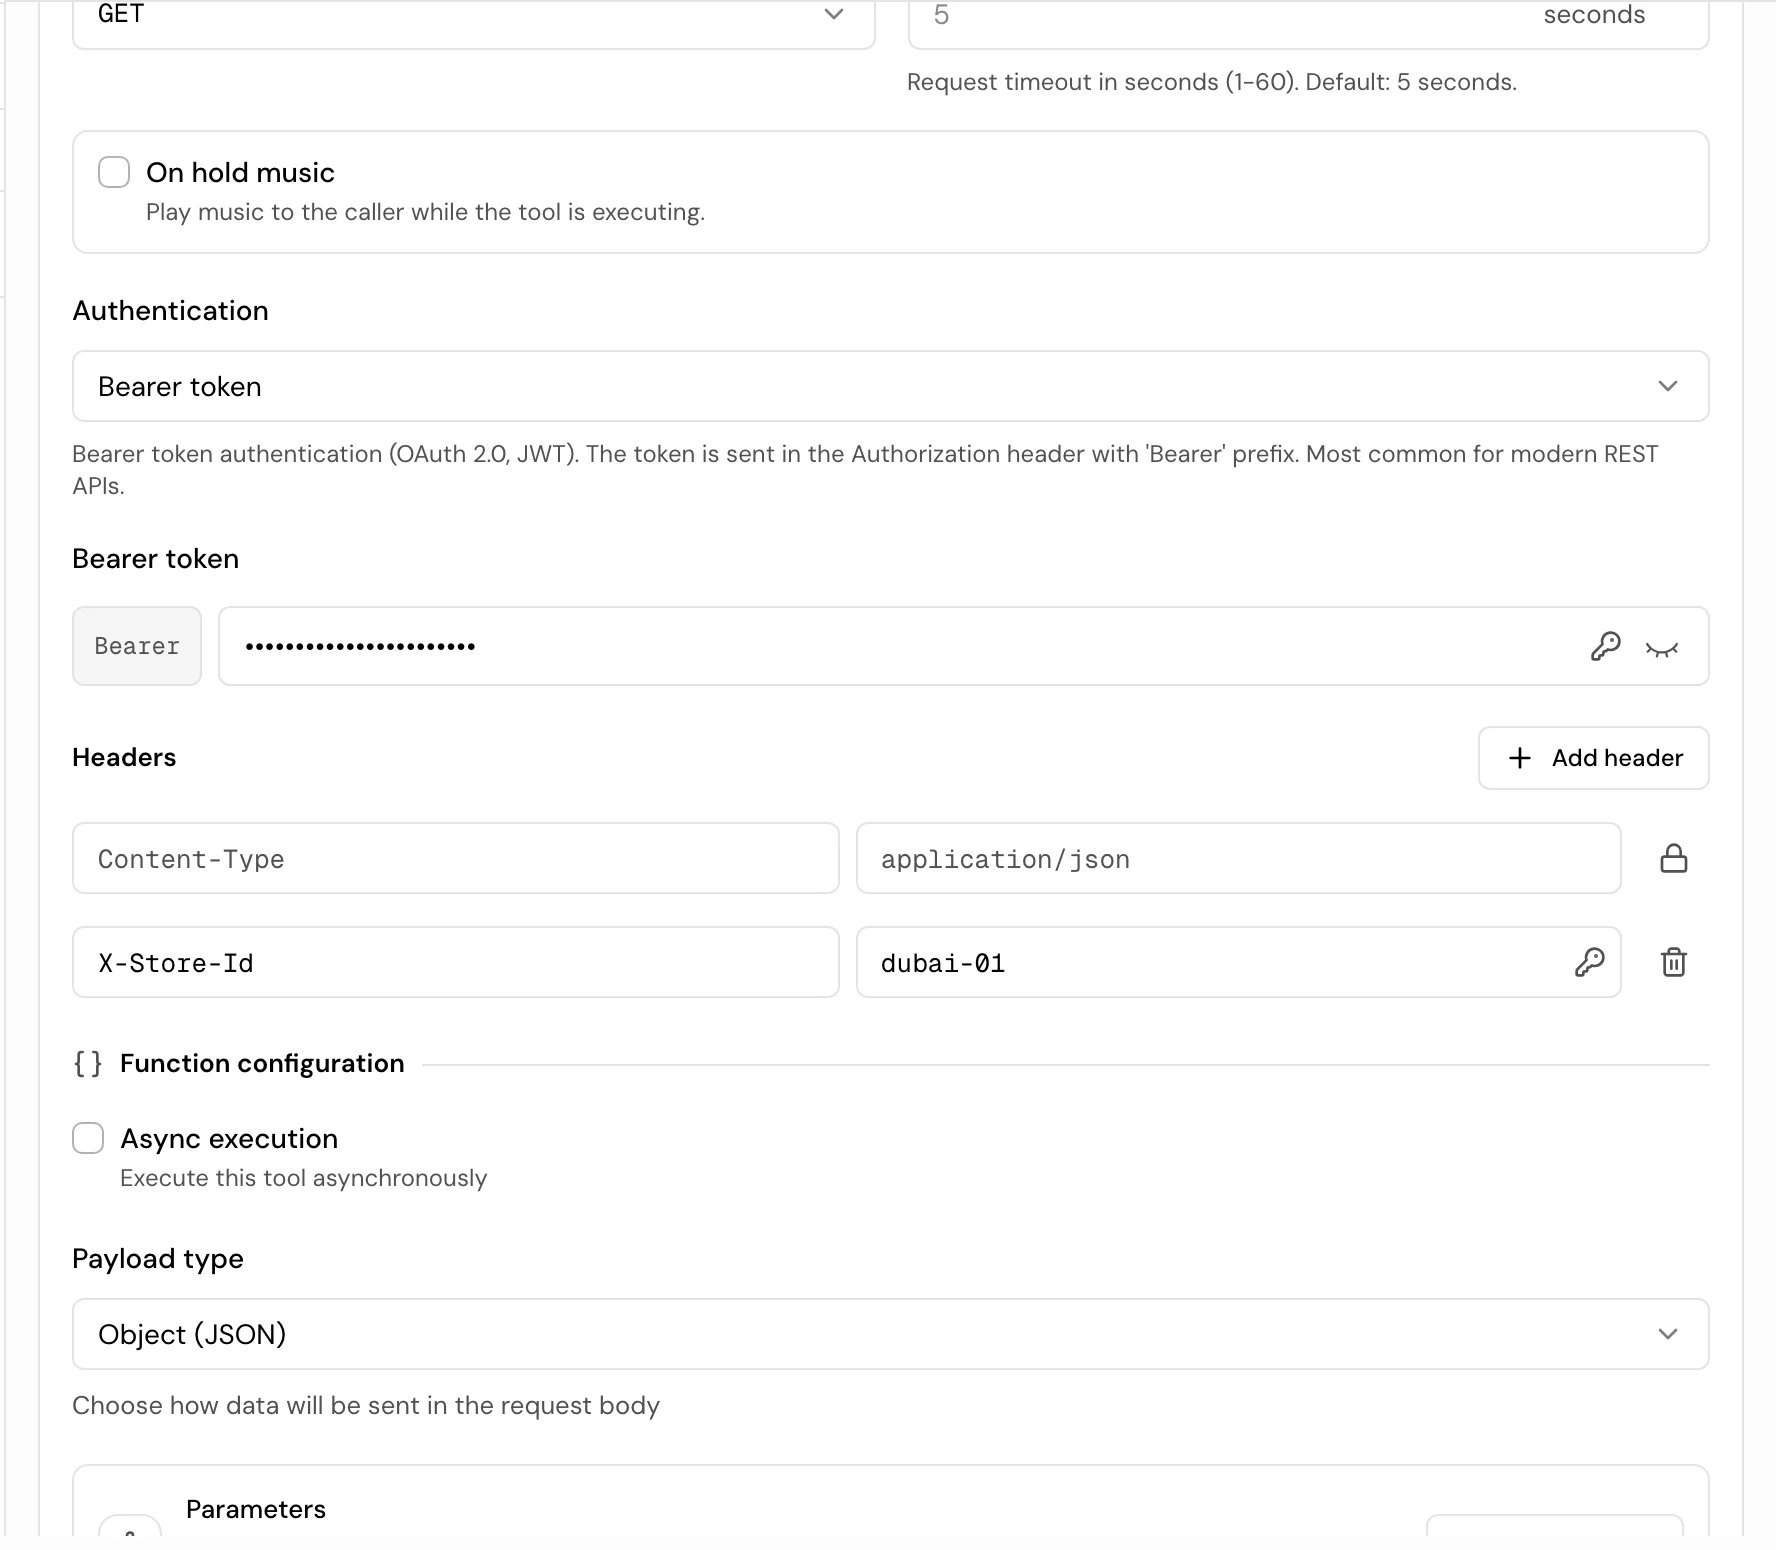
{{secrets.NAME}}, and the value is filled in when the request is sent. Basic authentication can’t use a secret: the username and password are stored with the tool.
Use either Authentication or your own Authorization header, not both.
Parameters
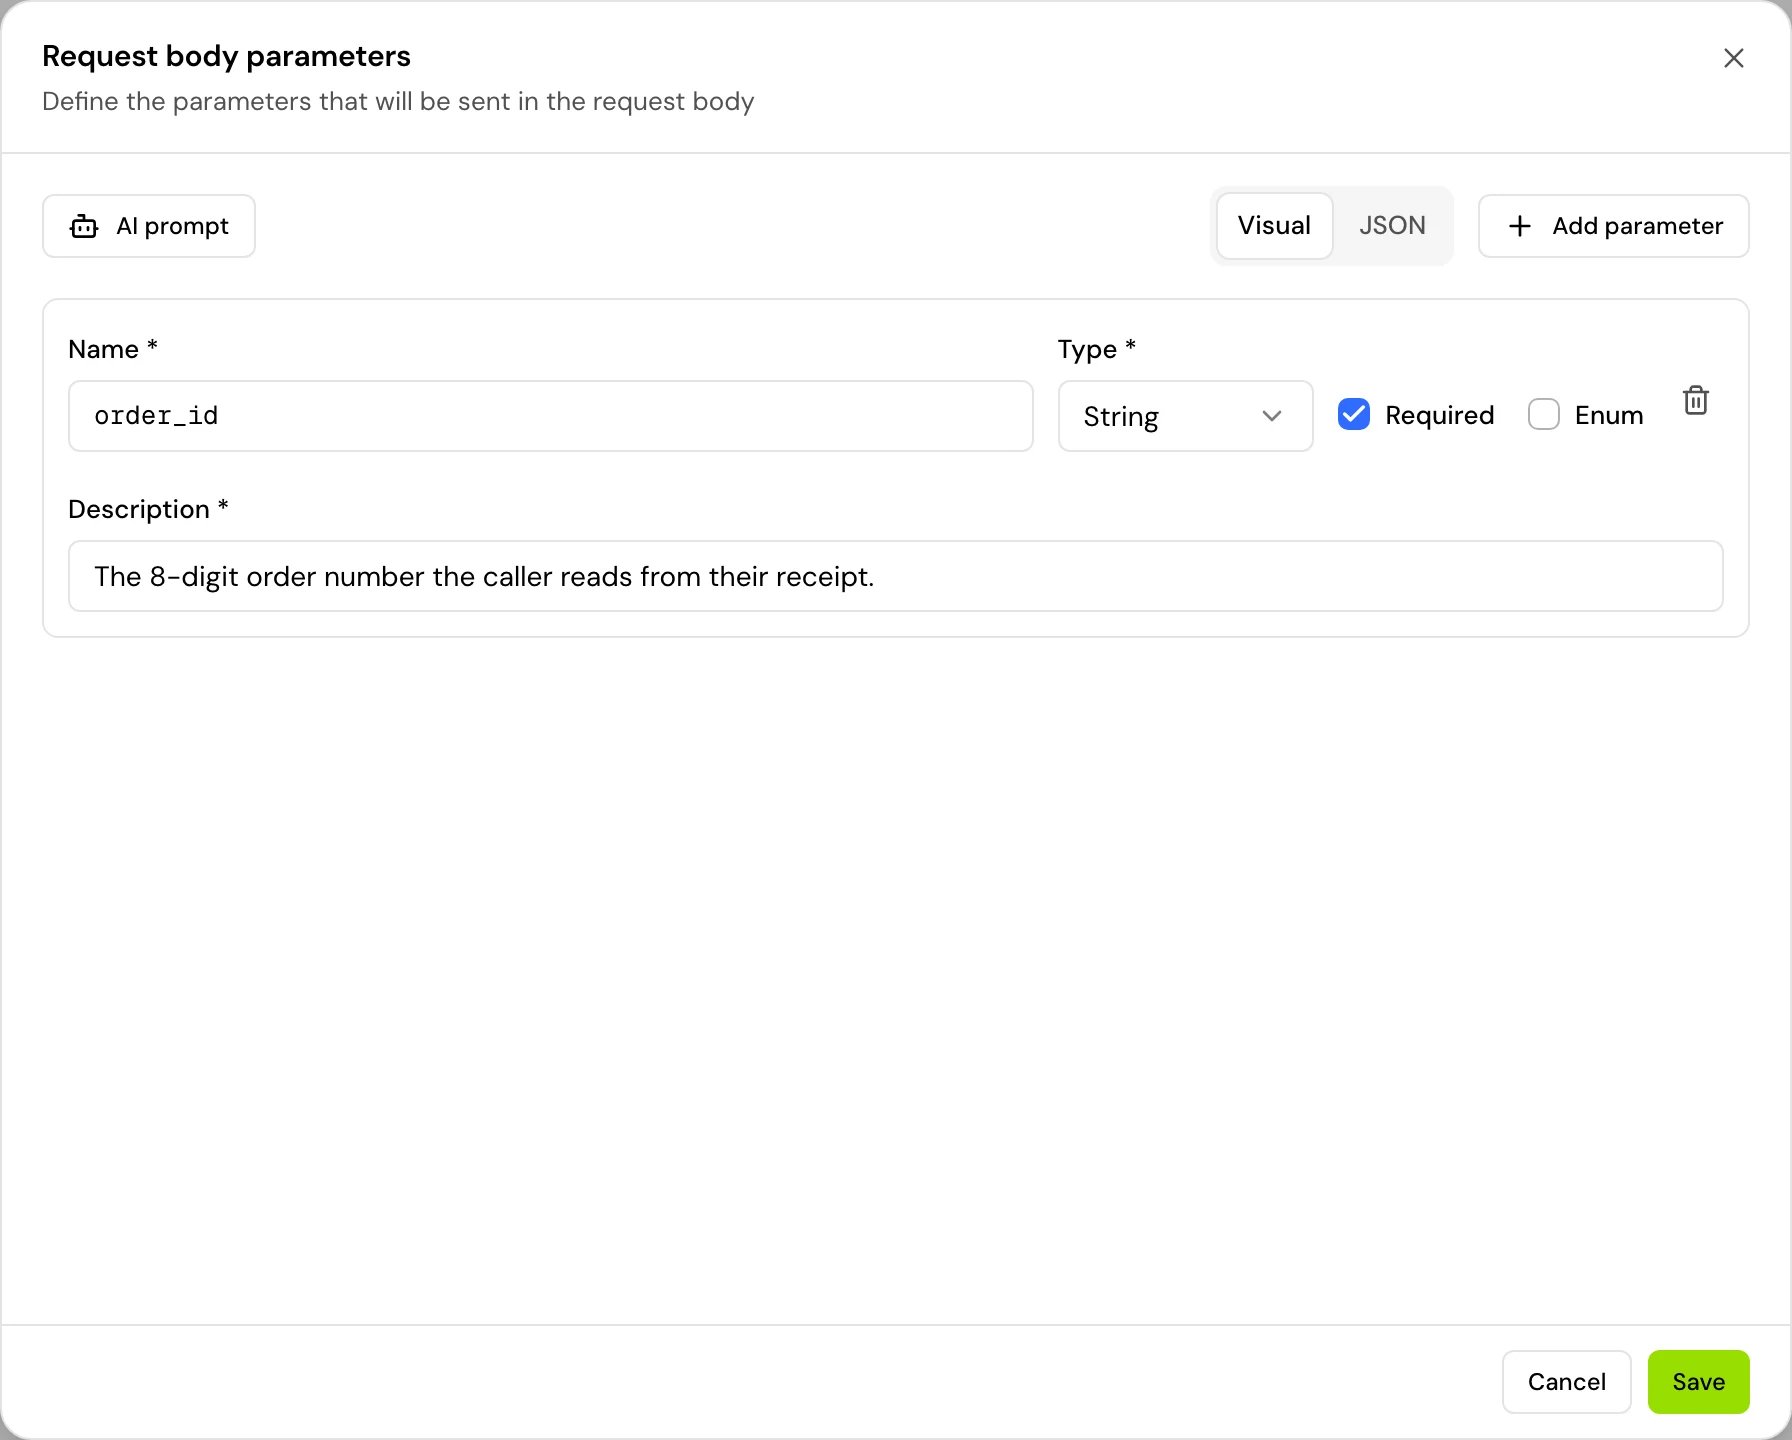
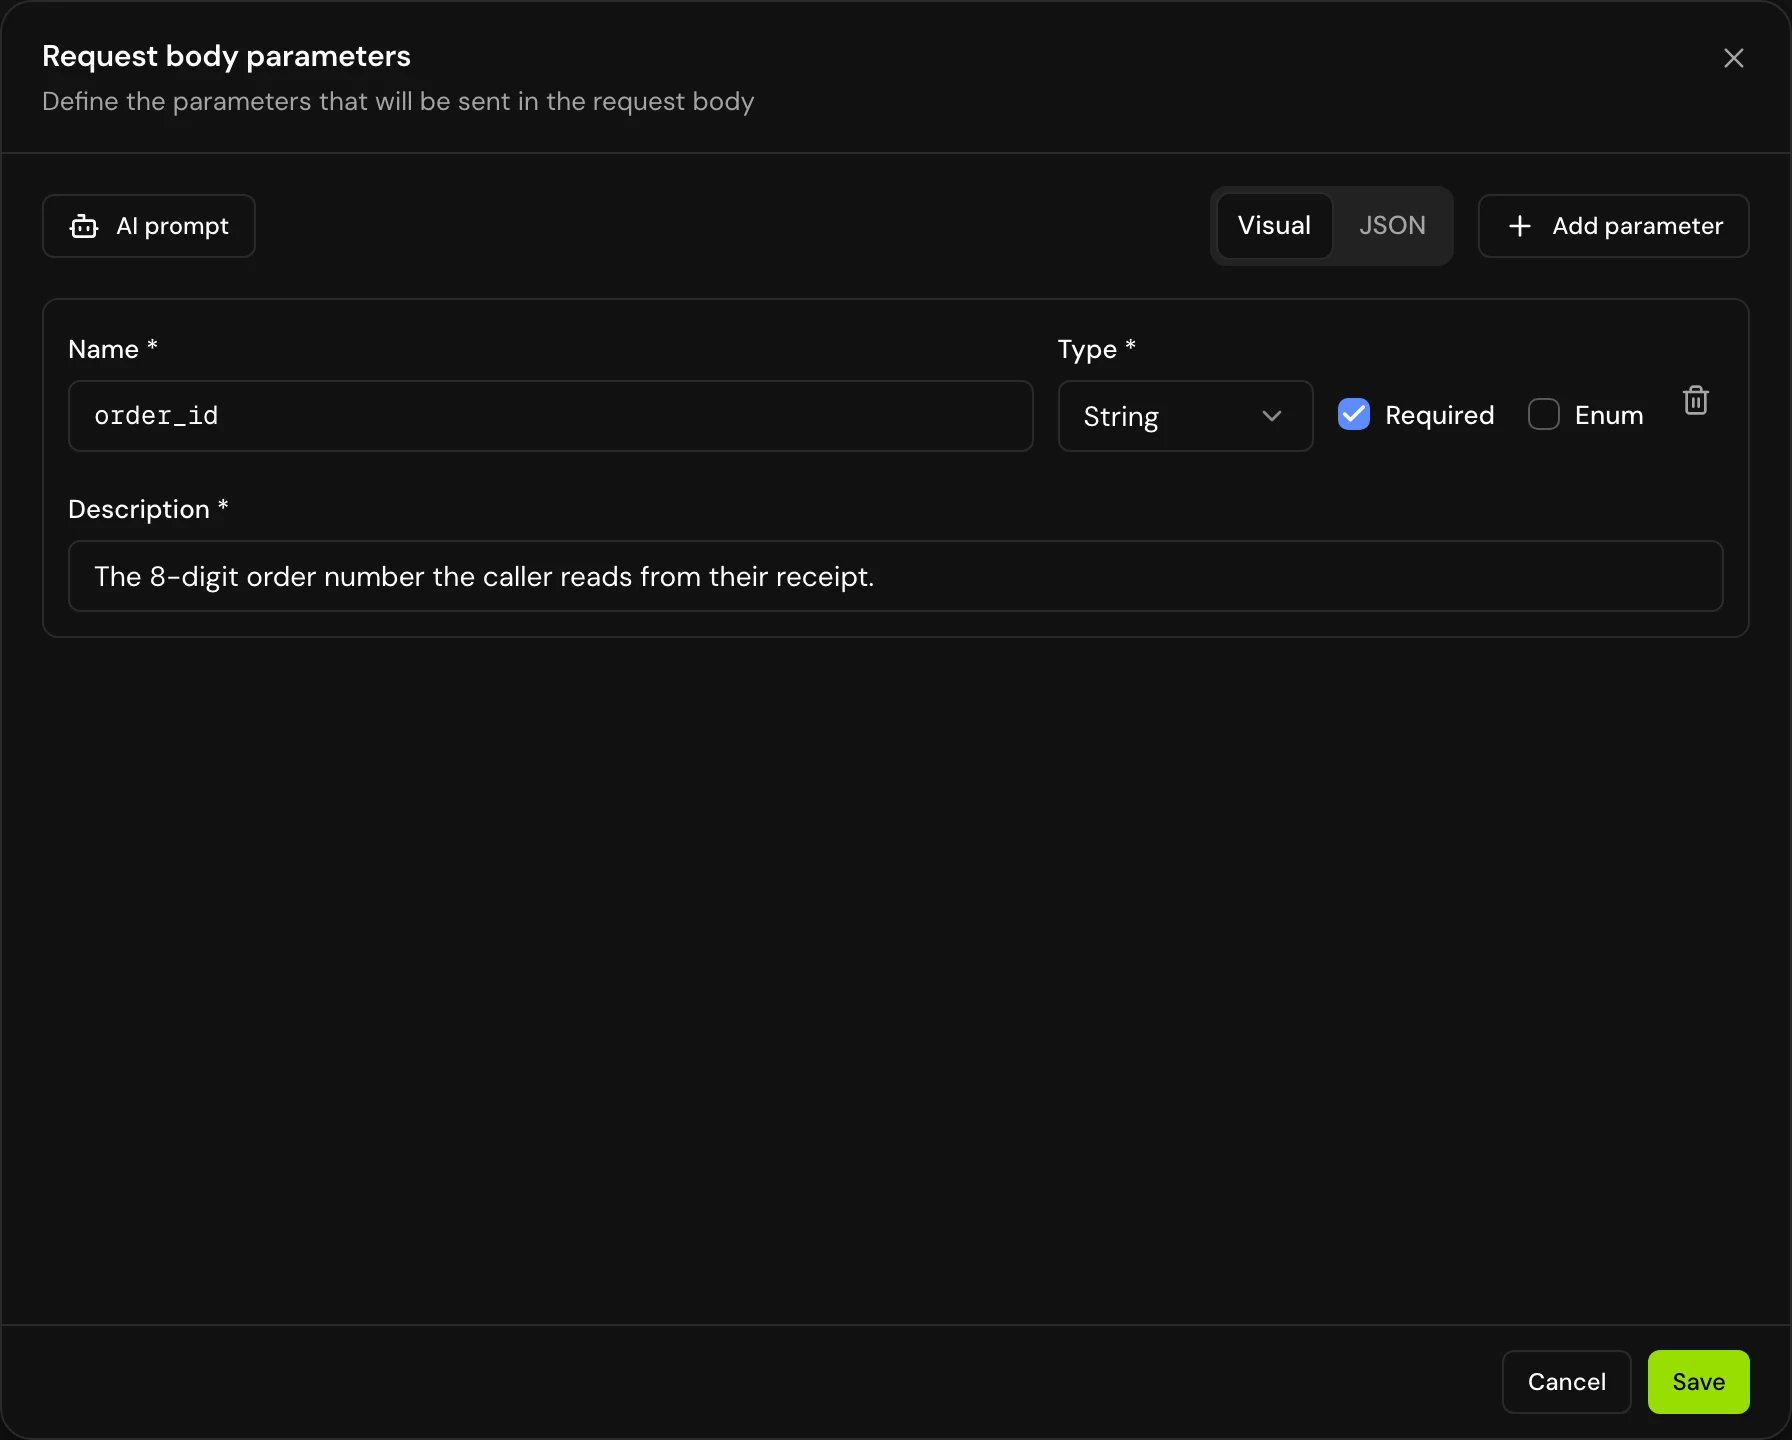
Parameters are the values the agent sends in the request. For each one, set:- Name: the key your API expects, for example
order_id. - Type: string, number, boolean, array or object.
- Description: what the value is and how to get it, for example “The 8-digit order number the caller reads from their receipt.” The agent reads it to know what to ask for.
- Required: whether the request needs it.
- Enum values (strings only): a fixed list of allowed values, one per line.
Single prompt and flow agents
Both types of agent fill in{{variables}} and {{secrets.NAME}} in the URL, header values, token and parameter values when the request is sent. A few other things differ depending on the type of agent that calls the tool.
You can build the URL from a variable, for example
https://api.example.com/orders/{{order_id}}, where order_id is a variable the agent already has.
Timeouts
A request that takes longer than the tool’s Timeout fails. A single prompt agent is told the action couldn’t be completed; a flow’s Tool step takes On failure. The default of 5 seconds suits fast lookups; raise it for slower APIs, up to 60. An agent can set its own Timeout for the tool in Tool configuration.Test the tool
Open the tool and click Test (in a flow, the Test tool button on a Tool step does the same). Enter sample values for the parameters and run it. The test shows the response, which you can use to set up the values a flow step extracts. Under Advanced configuration you can change the URL, method, authentication, headers and Request timeout (seconds) for this test only.The test sends the request from Hamsa’s servers and fills in secrets, as calls do. If the tool uses variables that have no value yet, for example when you test it from APIs & MCPs before attaching it to an agent, Test first asks you for a value for each one, then sends the request with them filled in. The test may retry a failed request up to three times; calls don’t retry.
Change a tool for one agent
Each agent can change a tool’s settings without changing the tool for other agents. In a single prompt agent, open Tool configuration under Tools. In a flow, open the Tool step and its Tool configuration. You can change the Tool name, Tool description, URL, HTTP method, Auth type and Token, Timeout (seconds), HTTP headers, Async execution and On hold music. For each parameter, choose AI extraction (the agent collects it) or a fixed value or variable, or Disable it to leave it out of the call: the agent isn’t asked for it and it isn’t sent. You can disable a header the same way. You can also add Custom parameters and Custom headers that the tool doesn’t define. Basic authentication can’t be changed here: “Basic Authentication must be configured in the tool definition.”Async execution
With Async execution on, the agent starts the request and carries on without waiting.- Single prompt agents are told the task started in the background. They never get the result, so use async only for requests whose answer the caller doesn’t need, such as logging a lead.
- Flow agents: switching a step to async replaces On success and On failure with a single Move to transition, and the app asks you to confirm because existing connections are removed. The flow moves on at once. When the response arrives, the step’s extracted variables are still set from it, but no transition follows from the result.
How it works on a call
Single prompt agents pass the result to the model, which uses it to answer the caller:
Flow agents don’t show the response to the model. A 2xx answer takes On success; anything else, including a timeout, takes On failure. To use data from the response in later steps, extract it into variables on the step. See API request step.
Good to know
- Name tools in lowercase words joined by underscores, such as
get_order_status. Single prompt agents show the name to the model in lowercase, with spaces and symbols turned into_. - Each save creates a new version. Agents keep their version until you click Sync to latest on the agent’s tool.
- You can’t delete a tool while an agent uses it.
Related
API request step
Call an API from a flow, with processing messages and extracted variables.
Secrets
Store API keys and reference them in tools.
Variables
Values you can send in a request.
APIs & MCPs
How agents use tools on a call.