

The editor at a glance
Open an agent from Agents list to get the editor. On the left are two cards:- Greeting message: what the agent says first.
- Agent instructions: the prompt the model follows for the whole call, with Enhanced turn taking and Prompt enhancer under it.


Write the greeting
The greeting is the agent’s first line. Pick how it’s made with the tabs on the Greeting message card.

- The greeting is required and can be up to 191 characters on both tabs.
- Both tabs accept variables, for example
Hello {{ customer_name }}, this is Sara from Acme.Variables are filled in before the agent speaks. - The caller can’t interrupt the greeting.
- If Wait for user to speak first is set to wait, the greeting plays after the caller’s first words instead of an answer to them. See Call behavior settings.
Write the agent instructions
Agent instructions is the prompt the model follows for the whole call. It is required and has no length limit. For what to put in it, see Write a prompt that works on calls. Under the text you see a count, for example “420 words · about 560 tokens”. The token count is an estimate of what the prompt costs on every turn; the model counts its own way. The whole prompt is sent with every reply, so a longer prompt costs more on every turn of every call. When the prompt has two or more Markdown headings (#, ## or ###), an Outline menu appears next to the count. Use it to jump to a section.
Insert variables
Type{{ to get suggestions, or click Insert variable in the field (Cmd+K on Mac, Ctrl+K on Windows). The list shows system, dynamic and environment variables. A name the agent doesn’t know is marked in the text so you can add it as a dynamic variable. See Variables.
Use the Jinja2 template editor for Jinja
For conditions, loops and filters, open the Jinja2 template editor with the code button in the field. Once the prompt contains a{% %} block or a {# #} comment, the field shows a read-only preview, and you edit it in the prompt editor.


1
Open the prompt editor
Click the code button in Agent instructions, or click the read-only preview.
2
Edit the template
Write in the editor on the left. The status line tells you whether the syntax is valid and points at the line of any error.
3
Preview it
Open the Preview tab and click Preview. The preview fills variables from Test data (JSON), which you can edit, or from the values of your last completed call.
4
Save
Click Save template (Cmd+S on Mac, Ctrl+S on Windows).

Prompt enhancer and enhanced turn taking
Two settings sit under the instructions:- Prompt enhancer (Disabled, Basic, Advanced; default Basic) adds Hamsa’s own speaking rules and the dialect instruction to your prompt. See What the prompt enhancer adds.
- Enhanced turn taking improves how the agent hears numbers and short “mm-hm” sounds. See Call behavior settings.
Add tools
Tools let the agent act during the call: look up an order, book a slot, ask your website to do something.1
Open the Tools section
In Configuration, open Tools and click Select tools.
2
Find the tools
Search, or filter by type (API request, MCP server, Web tool), status or collection. API tools can also be filtered by method, such as GET or POST. Tools that run in the background carry an Async tag.
3
Pick them
Select the tools this agent may use, then close the list.

A single prompt agent has no transfer tool. The only transfer it can make is at the maximum call length (see End the call). For transfers during the conversation, use a flow agent’s Transfer call step.
Save, test and publish
- Your edits autosave to your own draft. The header shows Save draft, Saving draft… and Draft saved.
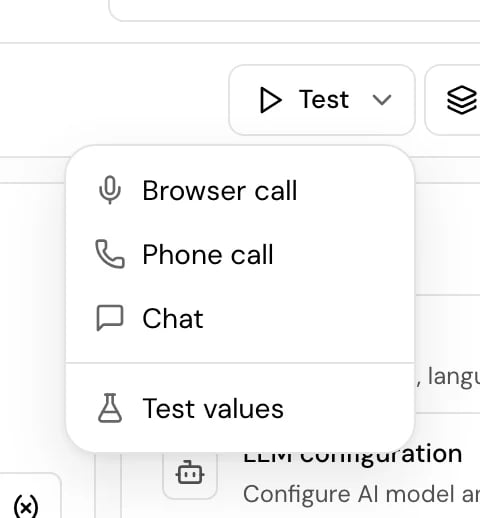
- Click Test to call the agent with Browser call, Phone call or Chat. Testing is off while there are unsaved changes. See Test your agent.
- Callers only hear a published version. To see what changed against the live version and publish, see Drafts and versions.
How it works on a call
- When the call starts, Hamsa fills the variables in your instructions and adds what the prompt enhancer adds.
- The agent says the greeting (or waits for the caller, if set to).
- On each turn, the model reads the instructions, the conversation so far and the current date and time, then replies or calls a tool.
- The call ends when the caller hangs up, when the agent uses smart call end, or when the maximum call length is reached. With Smart call end off, the agent never hangs up on its own before the limit.
Good to know
- The greeting is capped at 191 characters. Put anything longer in the instructions and use a Prompt greeting.
- Time variables in the instructions are filled in once, at the start of the call. The model still gets the current time on every turn. See Write a prompt that works on calls.
- If a Jinja part of the instructions fails on a call, the agent gets the text with all Jinja parts removed, not the raw template. Preview before you publish.
- The Configuration panel switches to Live call logs during a browser test call.
Related
Write a prompt that works on calls
How the runtime uses your prompt, and what to write.
Call behavior settings
Turn taking, silence, call length and sounds.
Variables
The values you can use in the greeting and instructions.
Test your agent
Call the agent before you publish.