This guide takes you through the two services most people start with. You transcribe a short recording, read the transcript, send a part of it to text to speech, generate it in a voice you pick, and download the audio.

Before you start

  • A Hamsa account. Every new account gets a Default project and free credits to try Hamsa. Both steps here use credits: speech to text about 1 credit a minute of audio, text to speech about 2 credits a minute.
  • A short recording, a minute or two, of someone speaking Arabic or English: an MP3, WAV, OGG, WebM or MP4 file up to 200 MB. You can also use a YouTube link, or record with your microphone.

1. Sign in

1

Open Hamsa Media

Go to media.tryhamsa.com. If you don’t have an account yet, click Sign up and create one.
2

Sign in

Enter your Email and Password and click Sign in, or use Google or Microsoft.
Hamsa Media opens on Home, in your project. To work in another project, pick it in the project switcher at the top of the page.
Home after signing in: the greeting, the credits meter at the top right and the Start something cards, with Transcribe a file firstHome after signing in: the greeting, the credits meter at the top right and the Start something cards, with Transcribe a file first

2. Transcribe a file

1

Open the upload dialog

On Home, click Transcribe a file. Speech to text opens with the upload dialog ready. (From the sidebar: Speech to text, then Upload a file.)
2

Choose the file

Drop your file on the dialog, or click Choose files and pick it.
3

Check the title and language

The Title is filled in from the file name; change it if you like. Set Main language to the language spoken: العربية (Arabic, the default) or English.
The Transcribe a file dialog with evening-bulletin.wav chosen, the Title filled in from the file name and Main language set to ArabicThe Transcribe a file dialog with evening-bulletin.wav chosen, the Title filled in from the file name and Main language set to Arabic
4

Start

Click Transcribe. “Transcription started.” confirms it, and the transcript appears at the top of the list as Pending.
The Speech to text list with the new transcript at the top marked Pending, and the Transcription started messageThe Speech to text list with the new transcript at the top marked Pending, and the Transcription started message
To use a YouTube link or your microphone instead, click YouTube link or Record on the Speech to text page. See Transcribe files and links.

3. Open the transcript

You don’t have to wait on the page: the Activity icon in the header follows the job, and “Transcript ready” tells you when it’s done.
1

Open it

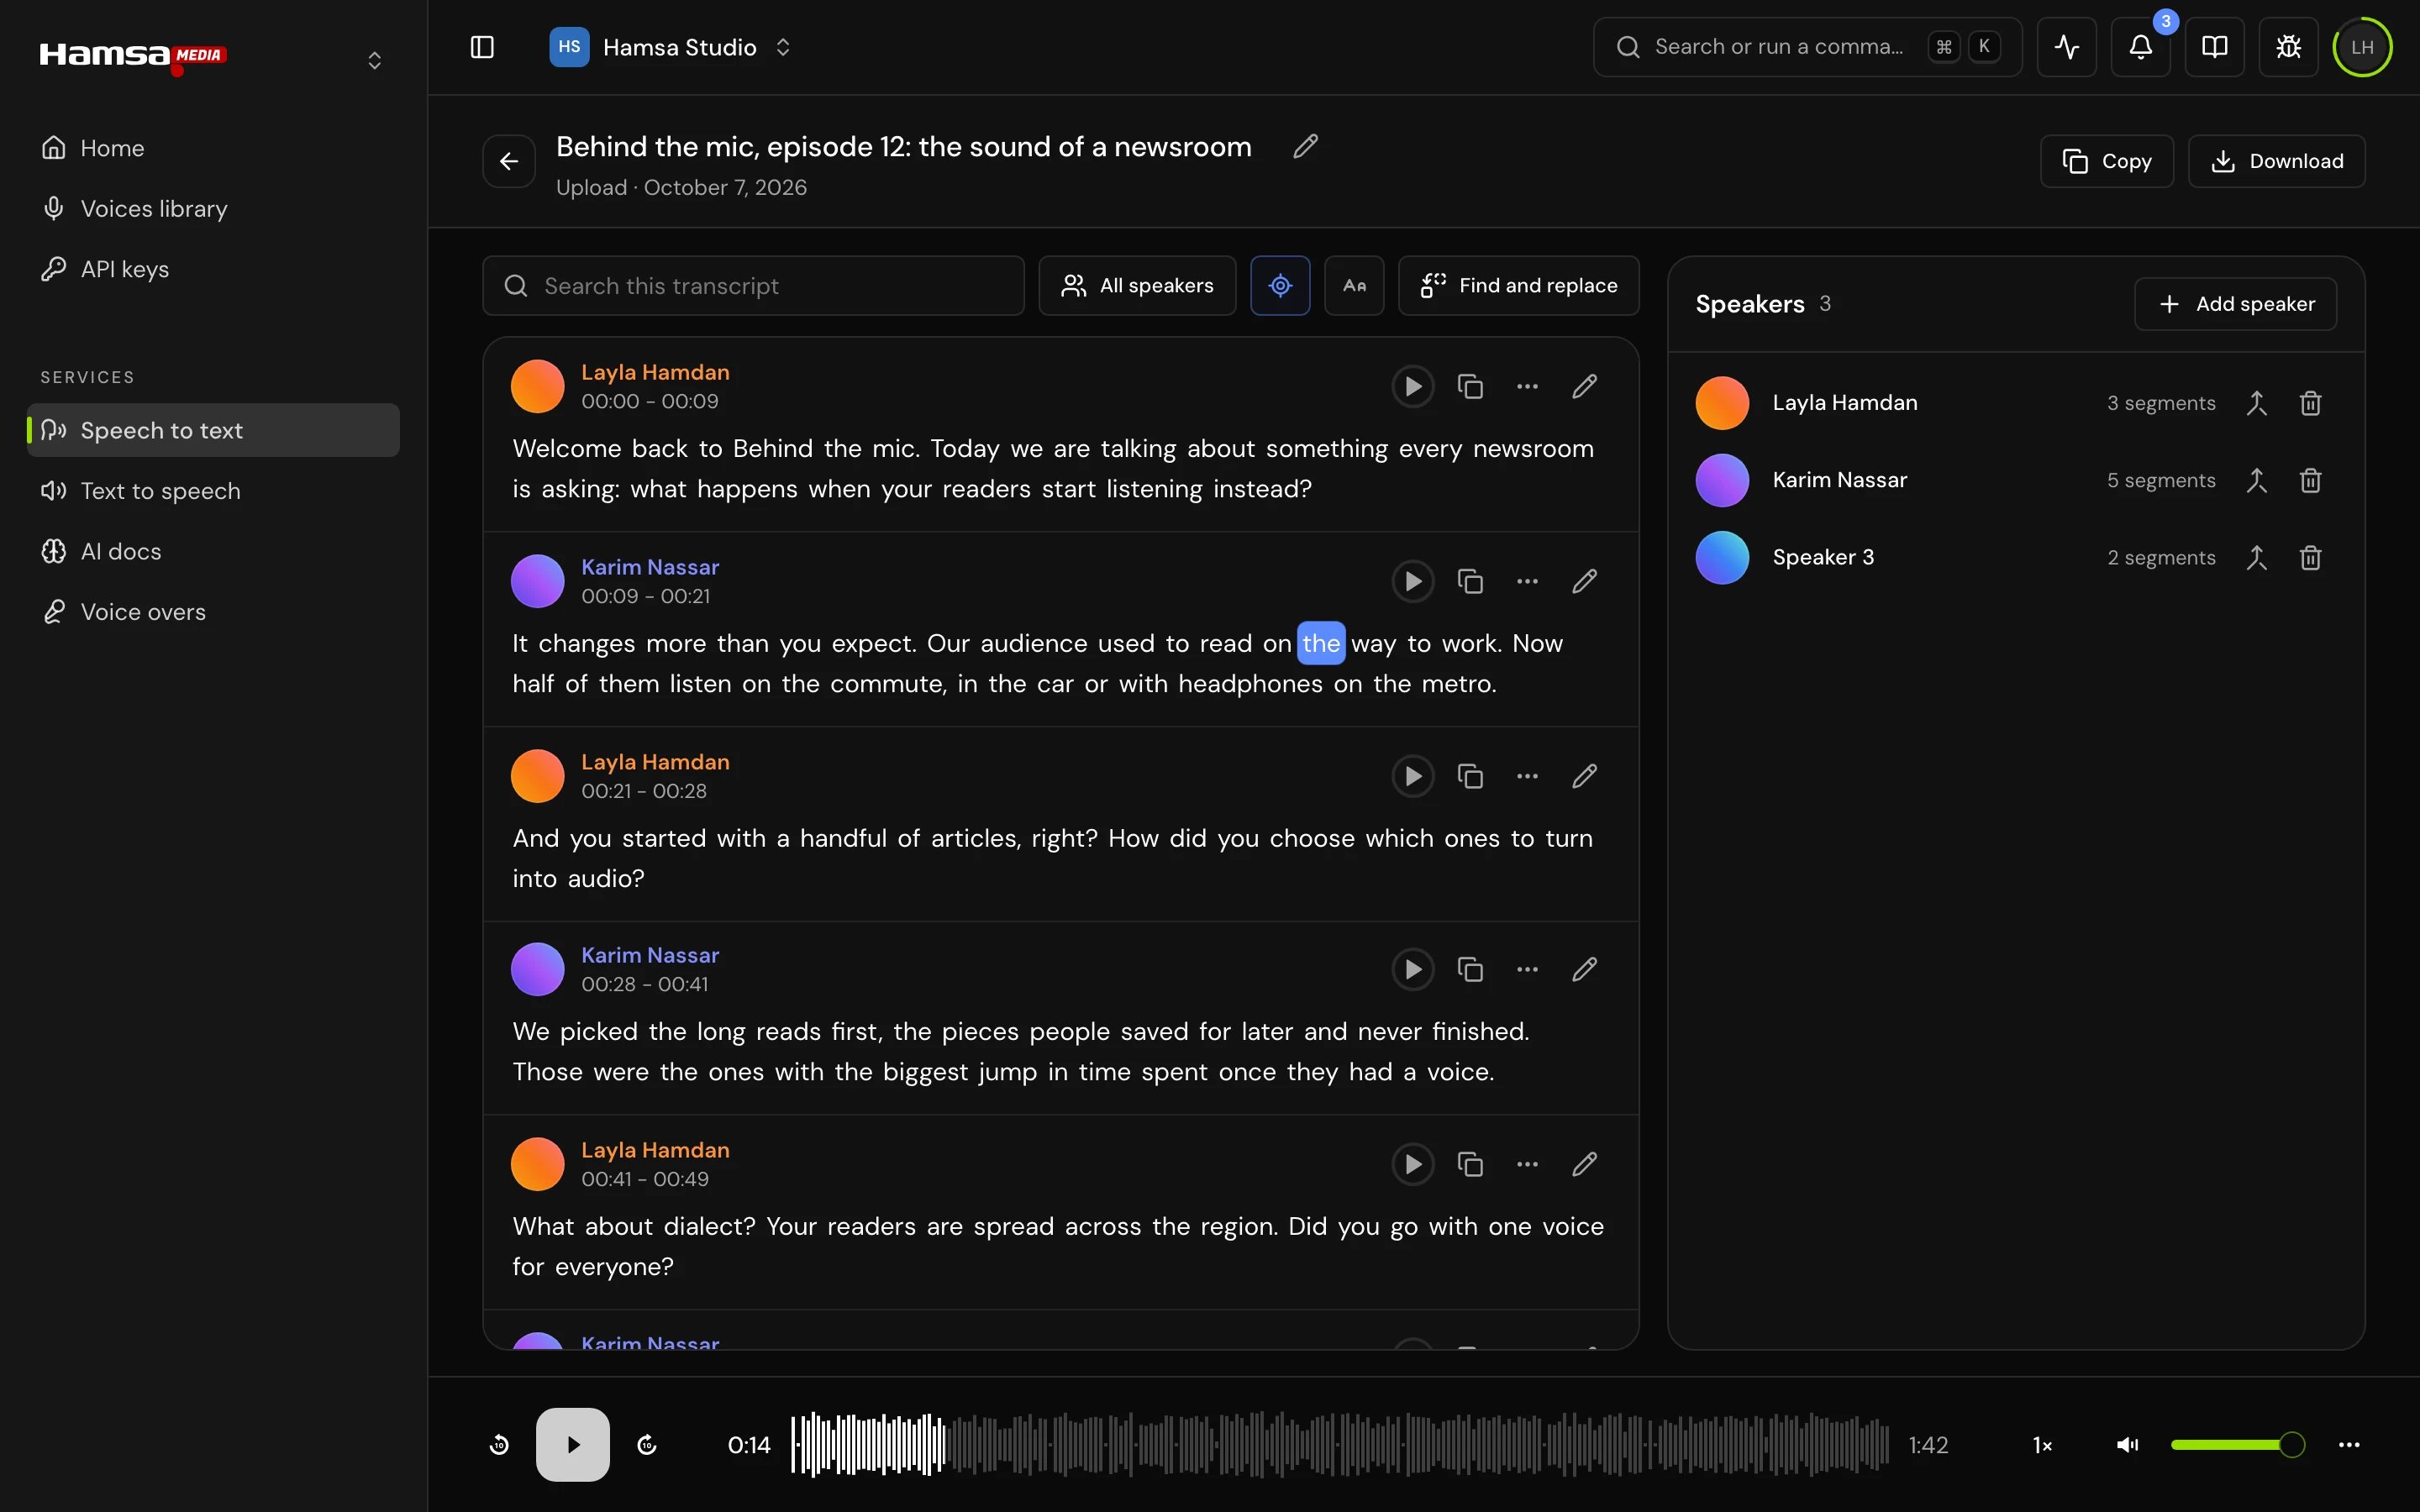
When the row says Completed, click it. The transcript opens in the editor, with the audio in the player at the bottom of the page.
2

Play it

Press Space, or click any word to play from there. The text follows the audio as it plays.
3

Correct a segment

If a word is wrong, click the pencil (Edit segment) on its segment, correct it, and click Save.
A segment open for editing, with Save and CancelA segment open for editing, with Save and Cancel
The transcript playing: the current word highlighted in its segment, the speakers on the right and the player at the bottomThe transcript playing: the current word highlighted in its segment, the speakers on the right and the player at the bottom
If the job shows Failed instead, open the row’s menu and choose Try again. See Troubleshooting.
The Run this job again dialog for a failed transcript, with Main language and Run againThe Run this job again dialog for a failed transcript, with Main language and Run again

4. Send part of it to text to speech

1

Pick the part

Shift-click a segment, then Shift-click another to select every segment between them. The bar above the list shows how many are selected.
Three segments selected, with Copy selection and Send to in the bar above the listThree segments selected, with Copy selection and Send to in the bar above the list
2

Send it

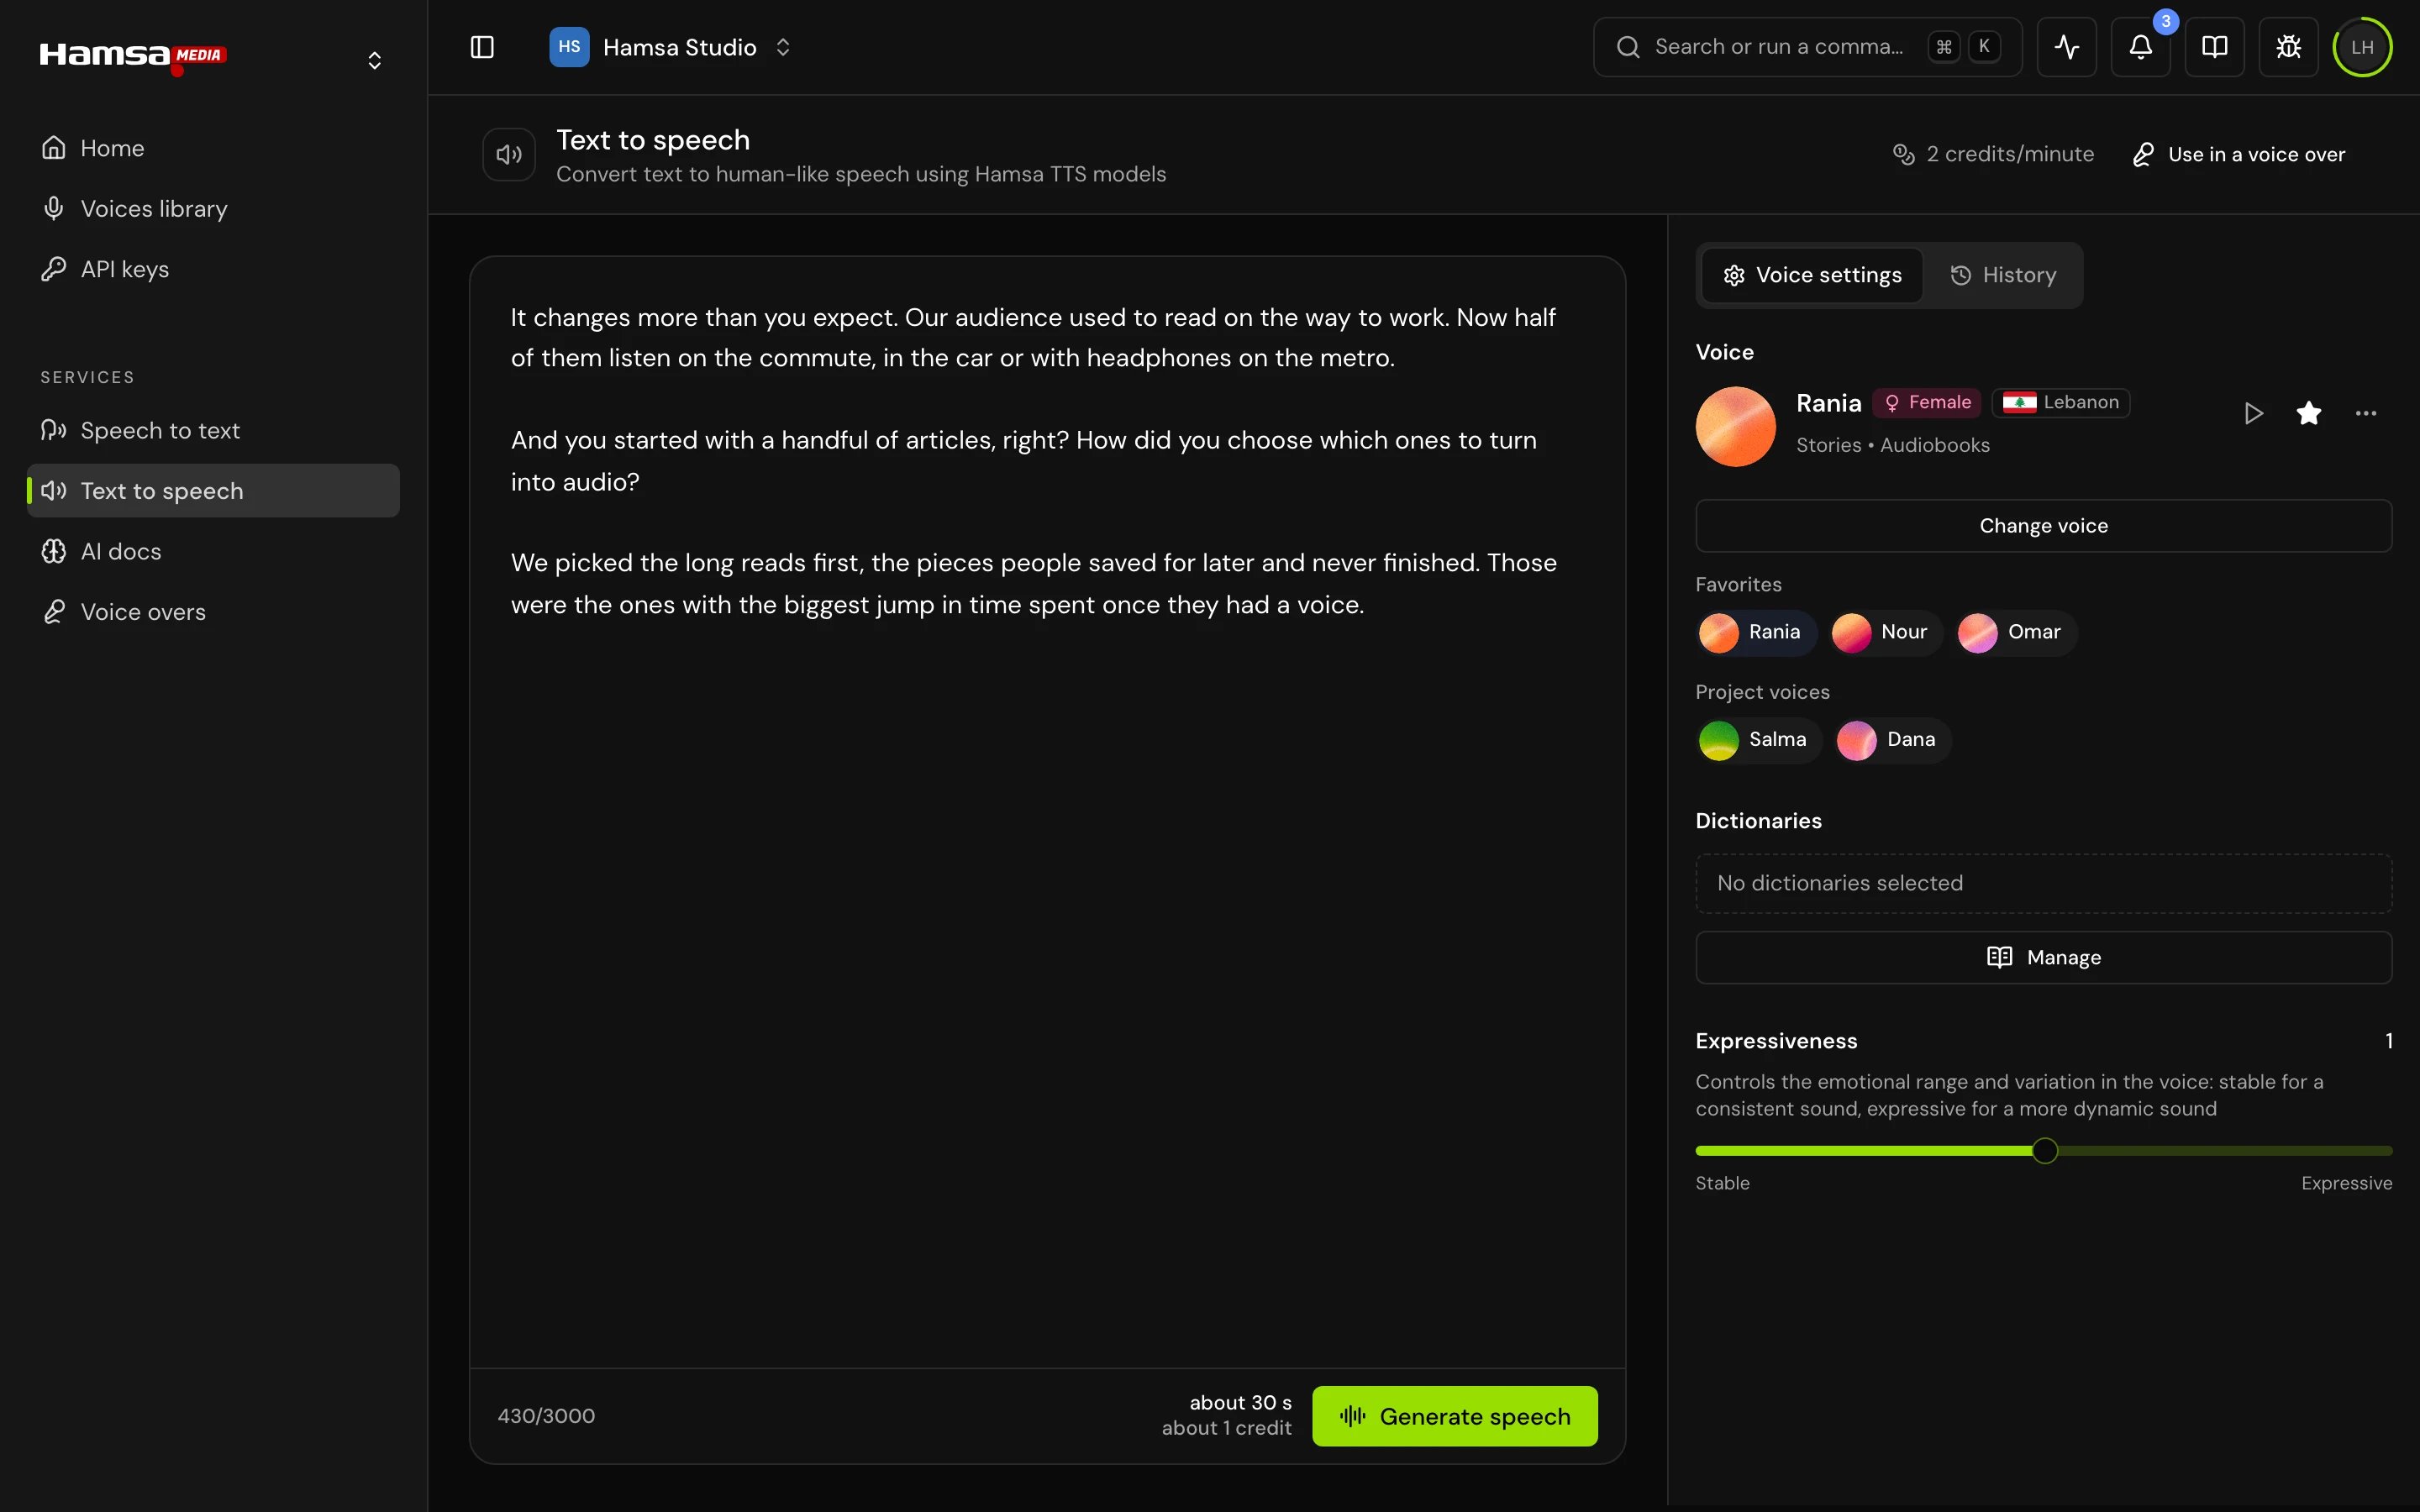
In the bar, click Send to, then Send to text to speech. Text to speech opens with the text as the script, without times or speaker names.
The Send to menu open on the selection bar, with Send to text to speech and Use in a voice overThe Send to menu open on the selection bar, with Send to text to speech and Use in a voice over
To send one segment, use Send to text to speech in its More actions menu. To send the whole transcript, use the Copy menu in the header. Text to speech takes up to 3,000 characters at a time. If your selection is longer, a dialog offers Use the first 3,000 characters.
You can skip the transcript and write a script yourself: click Text to speech in the sidebar (or Generate speech on Home) and type or paste into the editor.

5. Pick a voice and generate

1

Pick the voice

The Voice settings tab beside the script shows the voice that will read it. To change it, click Change voice, play a few samples, and click Select on the one you want. The voice decides the language and the dialect: pick an Egyptian voice for Egyptian Arabic, an English voice for English.
The voice browser opened from Change voice, with voices to play and SelectThe voice browser opened from Change voice, with voices to play and Select
2

Check the estimate

Beside Generate speech, the estimate shows the expected length and credits.
3

Generate

Click Generate speech, or press Cmd+Enter (Ctrl+Enter on Windows). The audio starts playing in the player as it arrives. When it’s done, “TTS job created successfully” confirms it.
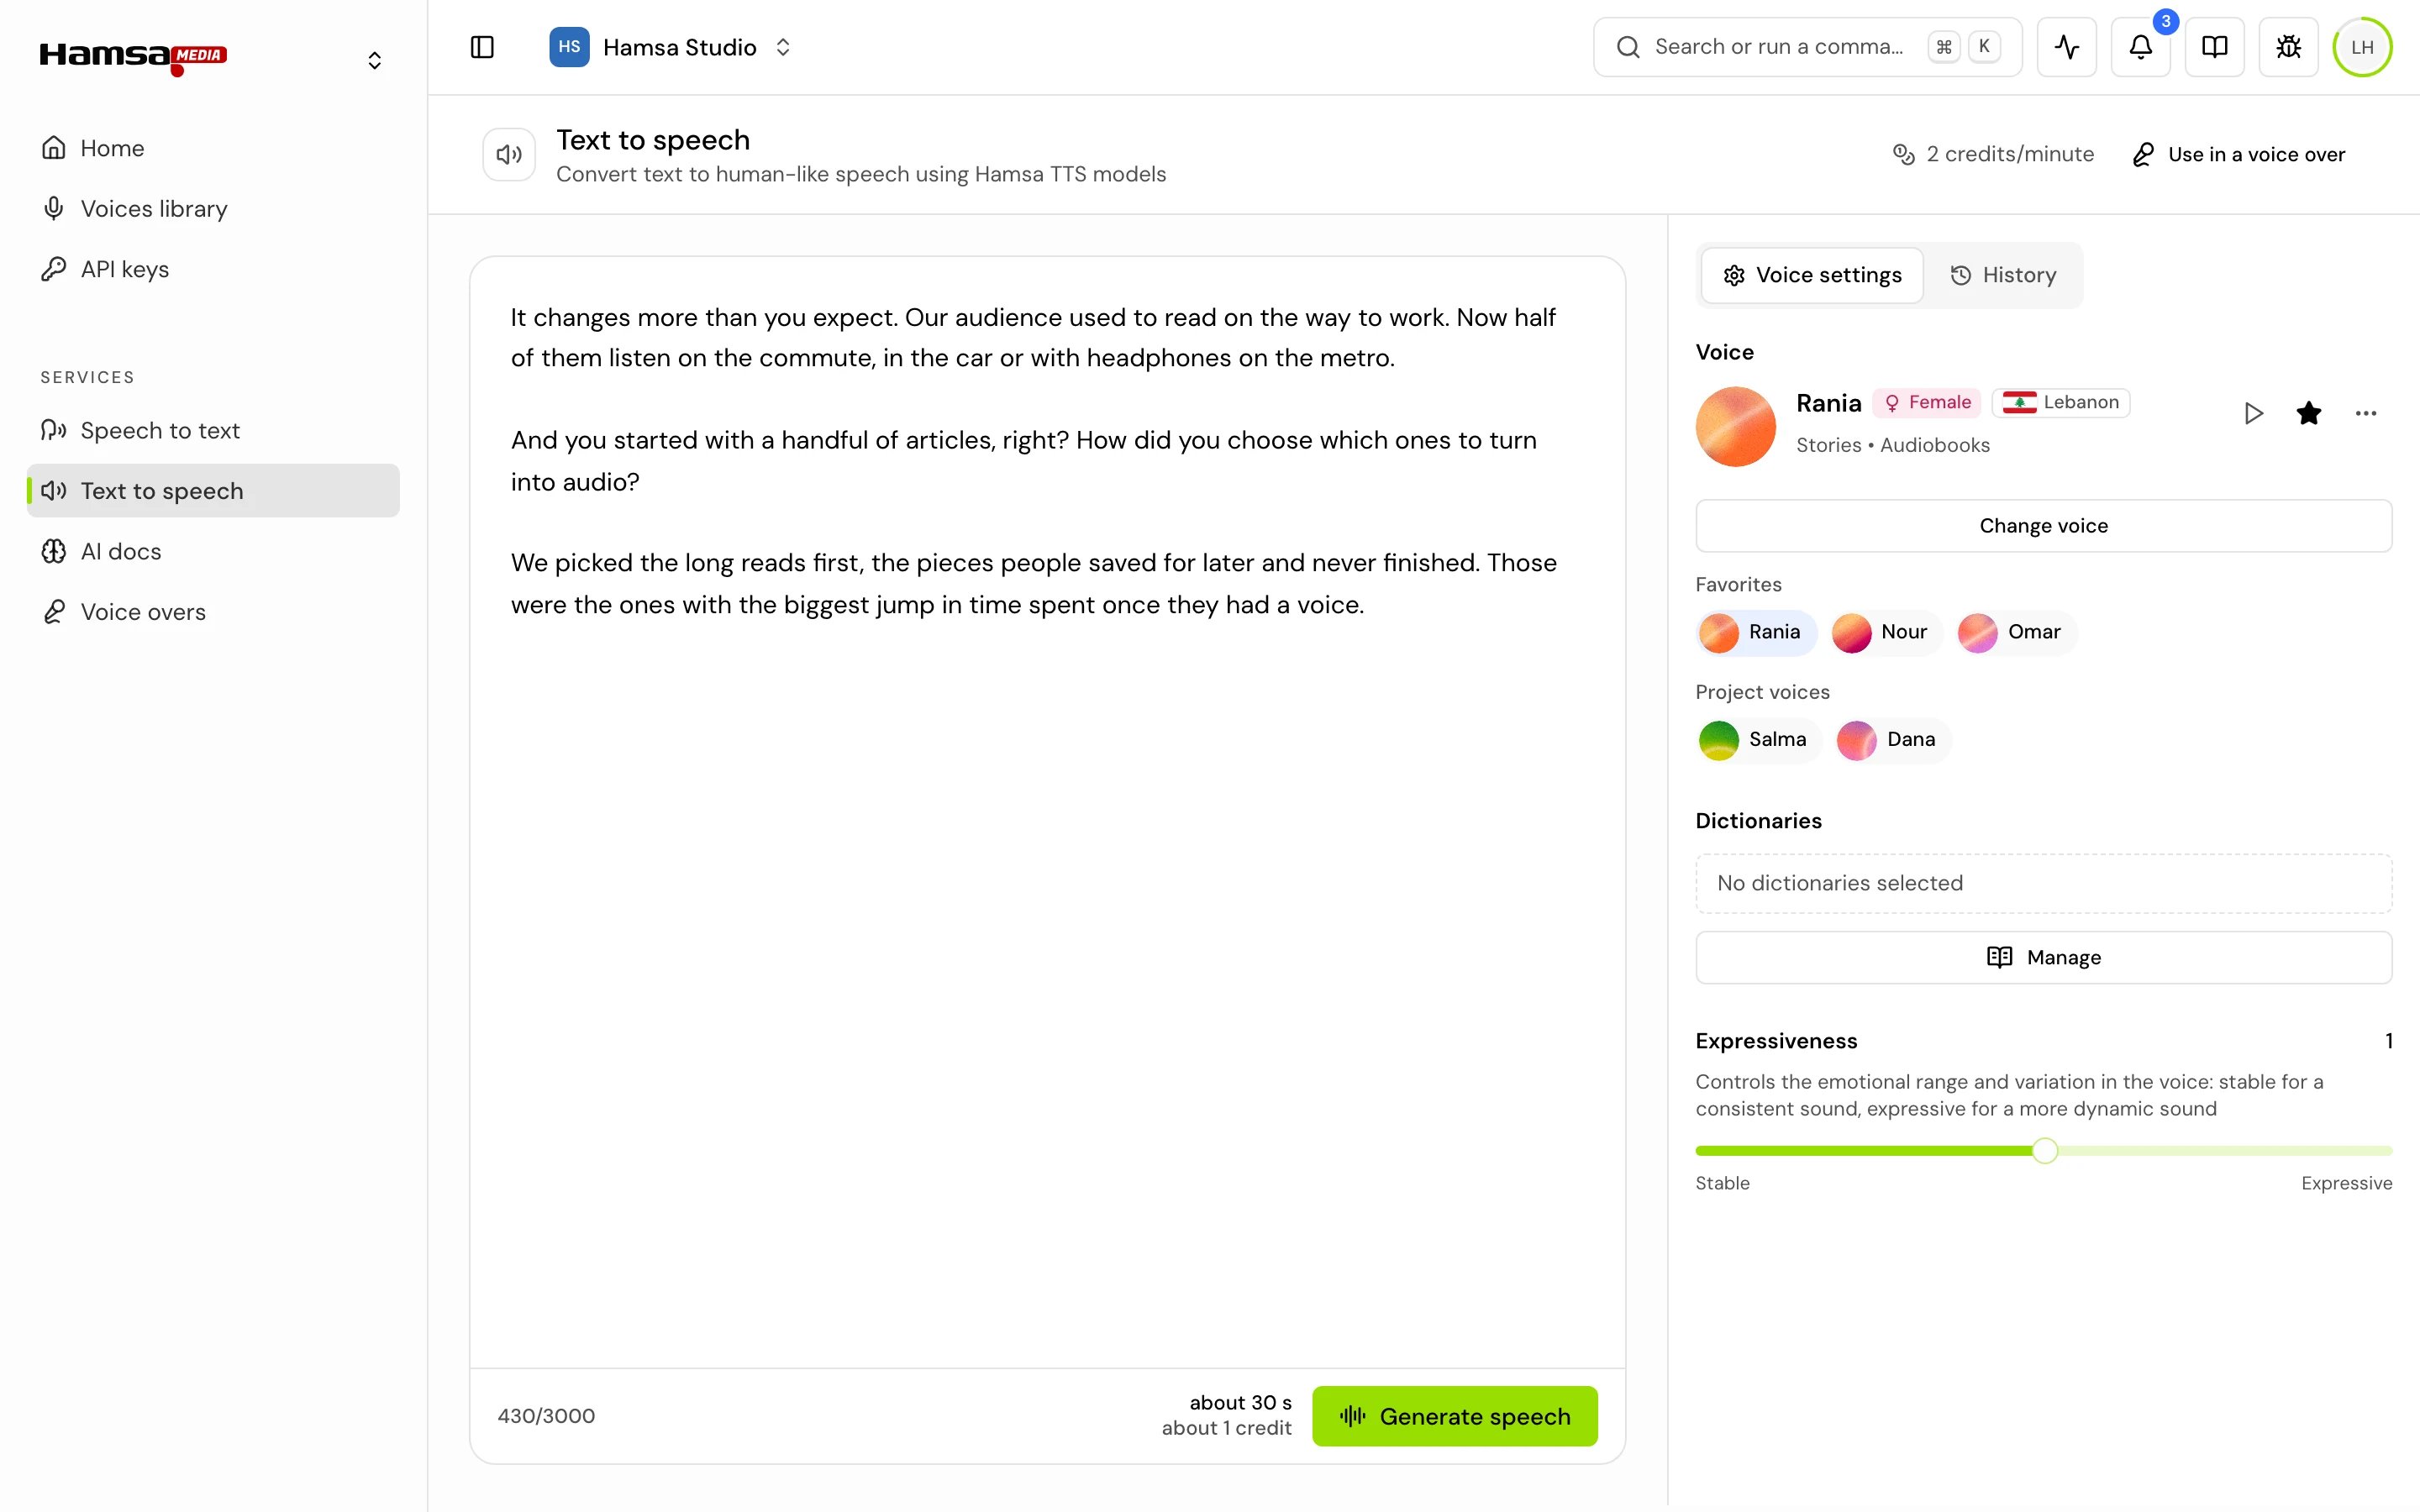
Text to speech with the transcript text as the script, the Voice settings tab with the voice and Change voice, and the estimate beside Generate speechText to speech with the transcript text as the script, the Voice settings tab with the voice and Change voice, and the estimate beside Generate speech

6. Download the audio

1

Open History

Open the History tab beside the script. Your take is at the top.
2

Download

Open the take’s menu (the three dots) and click Download. “Audio downloaded” confirms it.
A take's menu open in the History tab, on View, Copy, Download, Compare and DeleteA take's menu open in the History tab, on View, Copy, Download, Compare and Delete
The audio is a WAV file. You can also download the take in the player from its More options menu, with Download media.

Next steps

Export the transcript

Subtitles, Word, text, PDF, a web page or JSON.

Name the speakers

Rename Speaker 1 and Speaker 2, merge and filter.

Fix a word a voice gets wrong

Save how it should be said in a dictionary.

Make a voice over

Narration with music, from a prompt or your script.

Find a voice

Browse voices by dialect and use case, and compare them.

How it fits together

Projects, jobs, credits, voices and permissions.