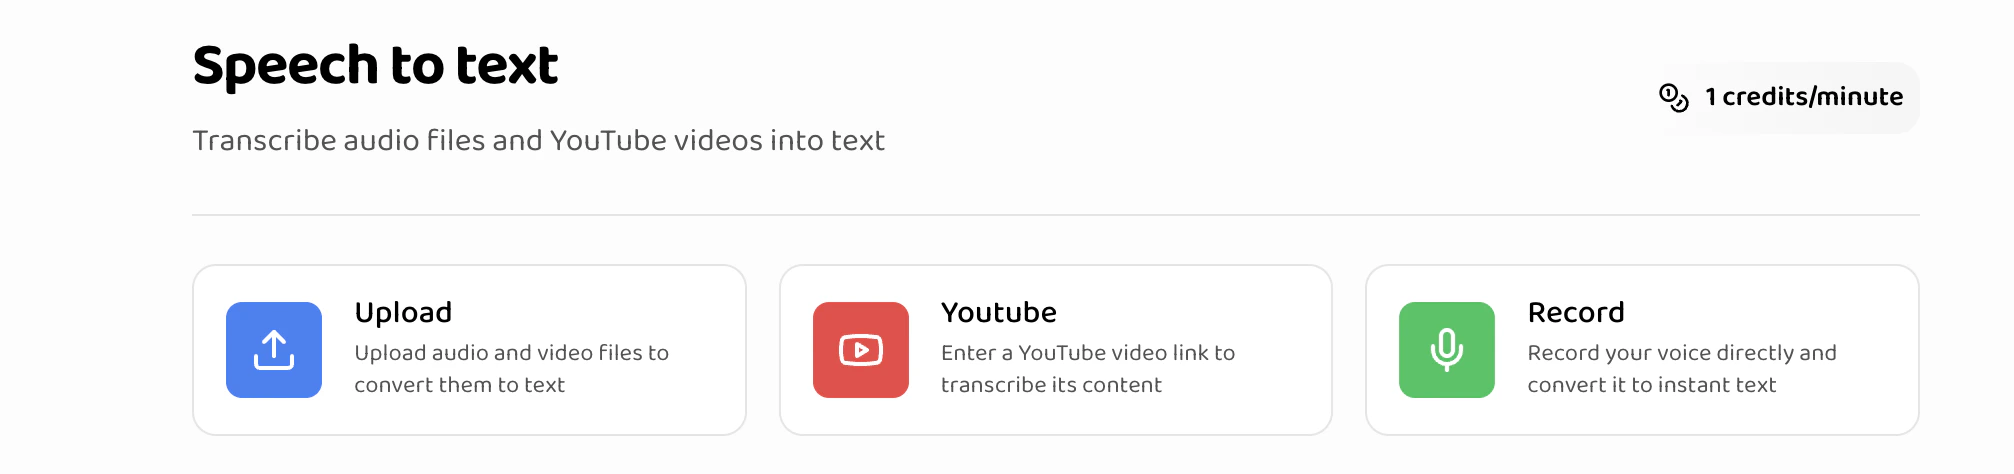
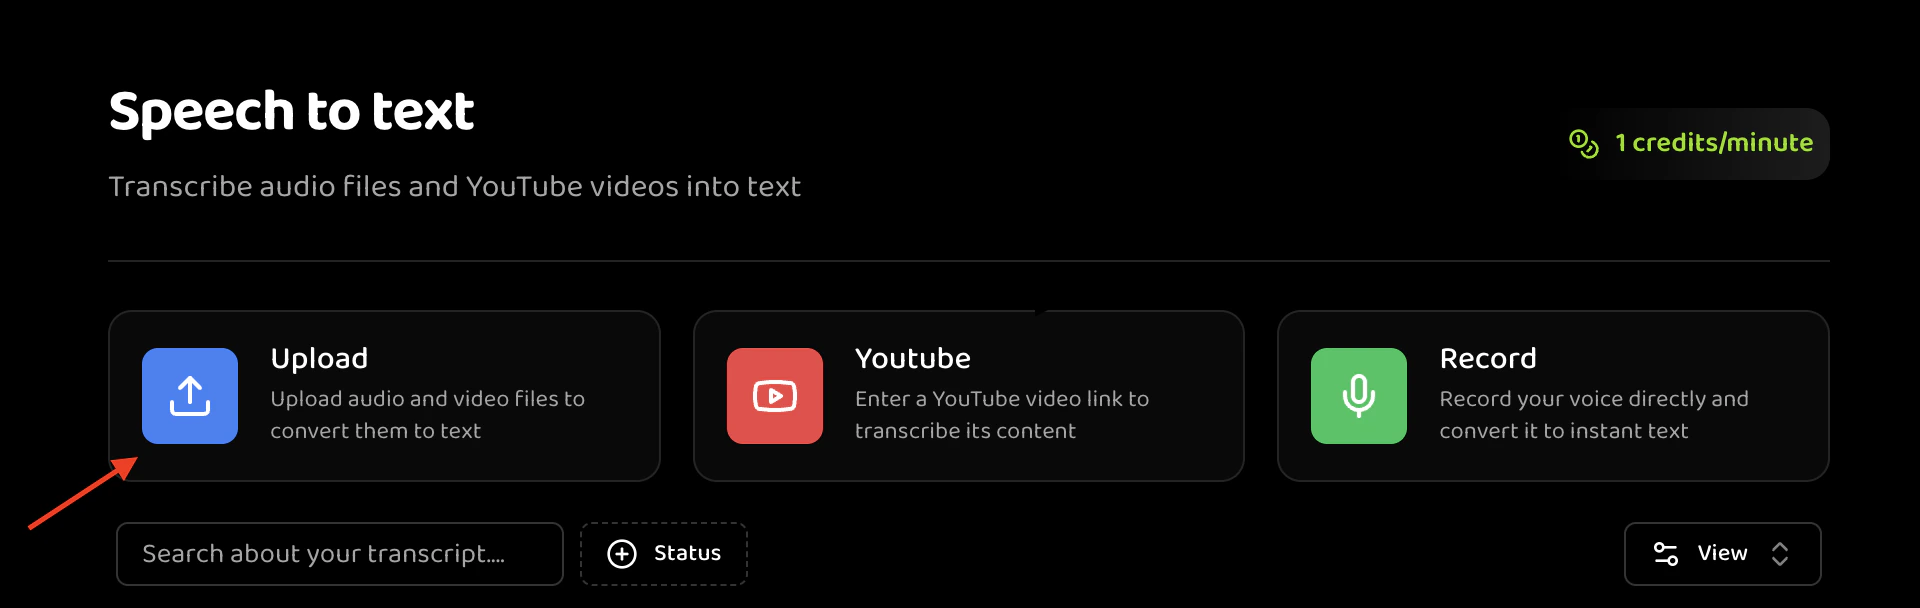
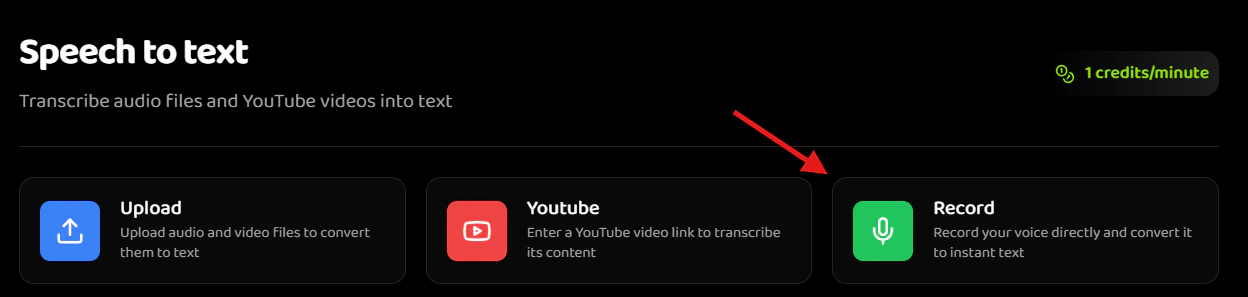
Overview
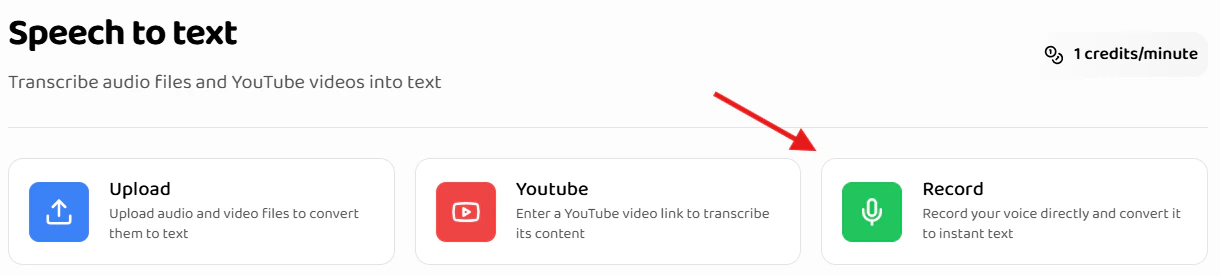
Speech to Text supports three methods for creating transcription jobs:- File Upload: Upload audio or video files from your device
- YouTube Link: Transcribe videos directly from YouTube
- Live Recording: Record audio directly in your browser
All transcription jobs are processed asynchronously. Processing time depends on file length, typically 1-5 minutes for most files. You can monitor
job status in real-time.
Creating File Upload Transcriptions
File upload allows you to transcribe audio and video files stored on your device.When to Use File Upload
File upload is ideal for:- Pre-recorded audio files
- Video files with audio tracks
- Archived recordings
- Files from your computer or mobile device
Supported File Formats
| Format | Extension | Max Size | Recommended |
|---|---|---|---|
| Audio - MP3 | .mp3 | 200 MB | Best compatibility |
| Audio - WAV | .wav | 200 MB | High quality |
| Audio - WEBM | .webm | 200 MB | High quality |
| Audio - OGG | .ogg | 200 MB | High quality |
| Video - MP4 | .mp4 | 200 MB | Most common |
| Video - MOV | .mov | 200 MB | Apple format |
Requirements
| Field | Requirement | Validation |
|---|---|---|
| File | Required | one file max size 200 MB |
| Title | Required | Auto-filled from filename, editable |
| Language | Required | Select from language dropdown |
Step-by-Step Process
-
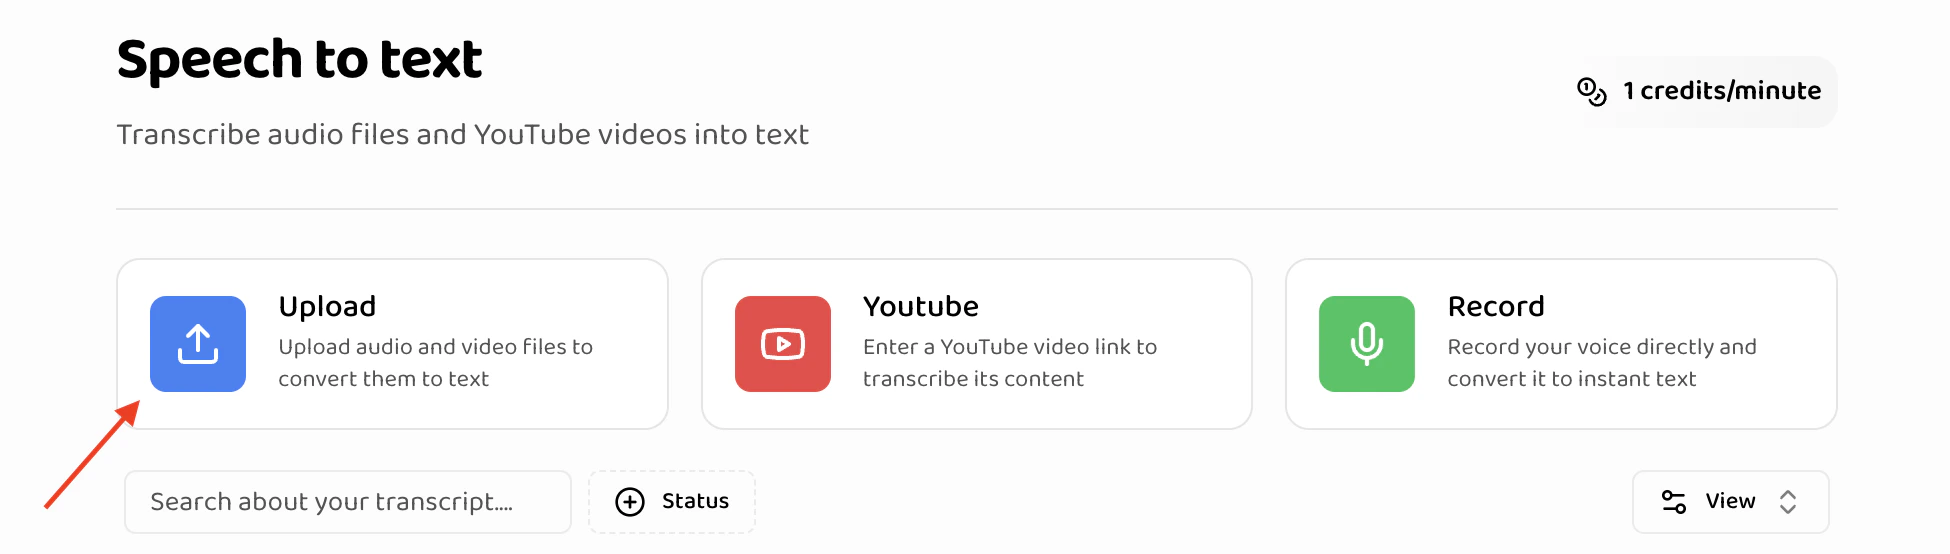
Navigate to Speech to Text
- Go to the Speech to Text section in your dashboard
- Click the “Upload” button in the action buttons area
-
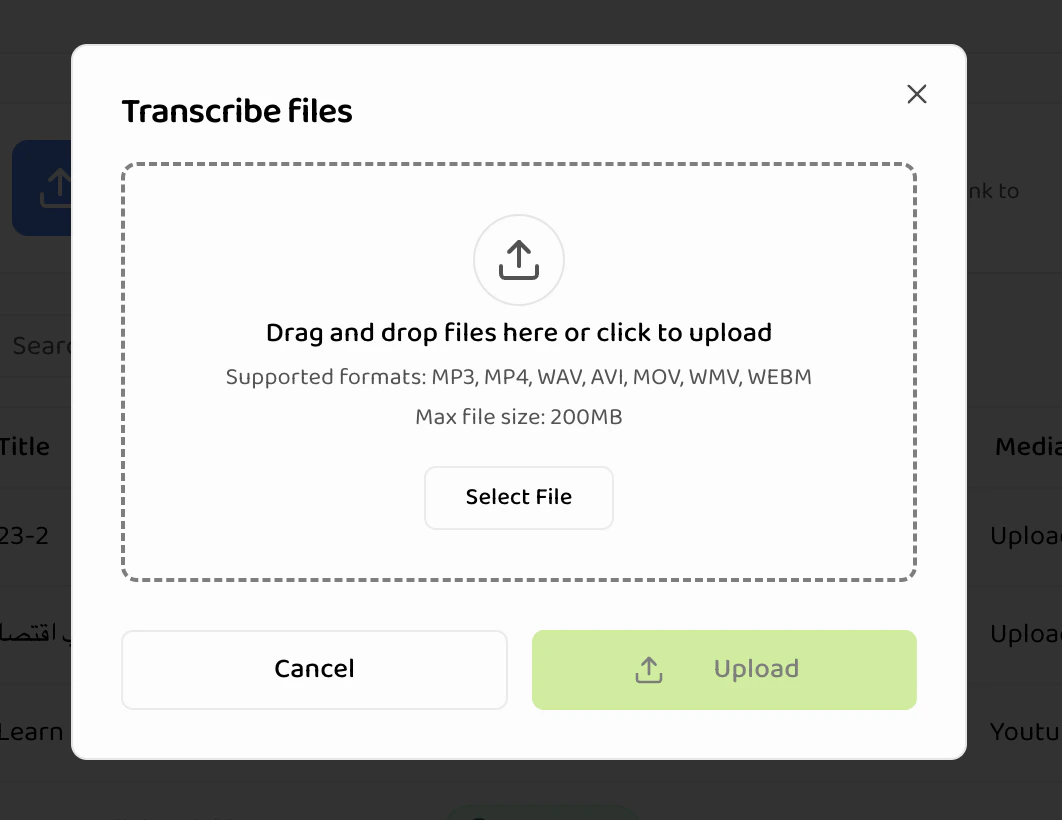
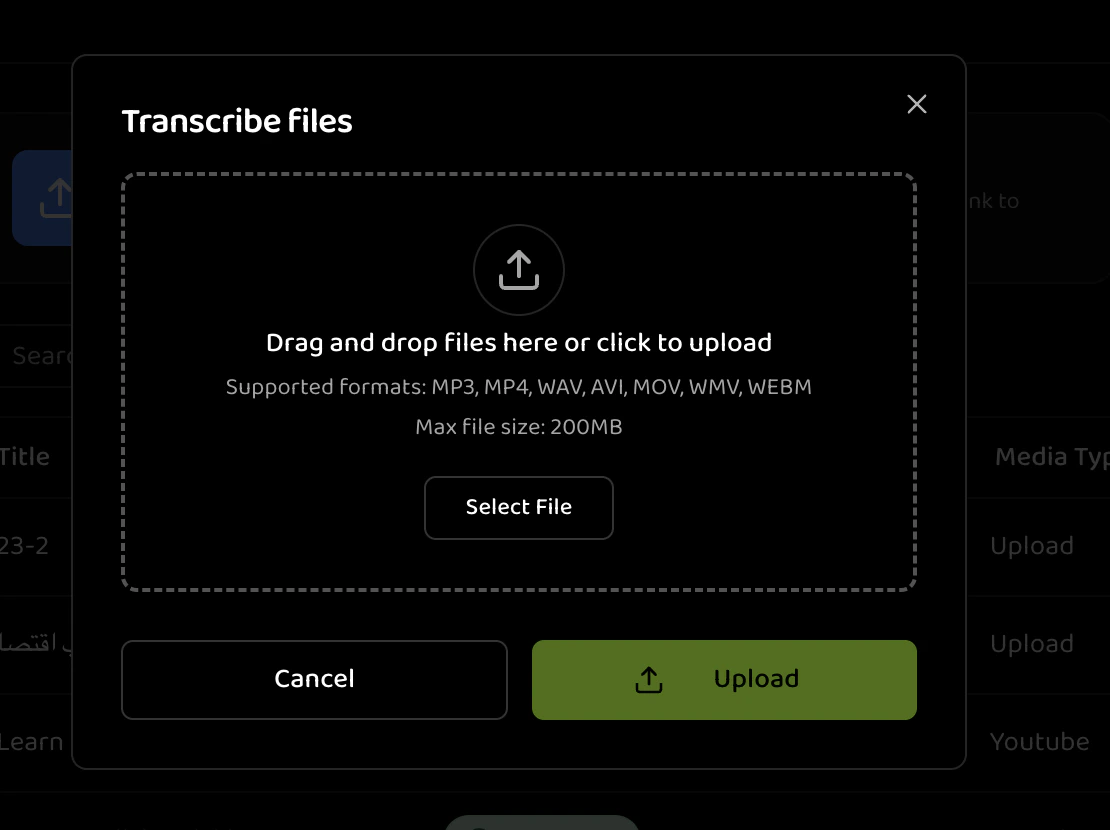
Open Upload Modal
- The “Transcribe Files” modal opens
- You’ll see a drag-and-drop area
-
Select File
- Drag and Drop: Drag a file from your file explorer into the upload area
- Click to Browse: Click the upload area to open file picker
- Single File: Select one file at a time
- File appears below the upload area
-
File Validation
- System validates file format immediately
- Invalid files are rejected with error message
- File size is checked (must be under 200MB)
-
Enter Job Details
- Title: Auto-filled from filename, can be edited
- Example: “Meeting Recording - January 15”
- Example: “Customer Interview - Product Feedback”
- Primary Language: Select the language spoken in the audio
- Default: Arabic
- Options: Arabic, English
- Title field updates automatically when file is selected
- Title: Auto-filled from filename, can be edited
-
Review File
- Check file name is correct
- Verify file details are accurate
- Remove file if needed (click X button)
-
Submit for Processing
- Click “Upload” button
- File uploads to the server
- Transcription job is created
- You’re redirected to the jobs list
File Upload Best Practices
File Preparation:- Ensure files are not corrupted or password-protected
- Verify audio quality is sufficient for transcription
- Use clear, descriptive filenames before uploading
- Compress very large files if possible (while maintaining quality)
- Clear audio with minimal background noise
- Single language per file (multi-language may reduce accuracy)
- Adequate volume levels
- Minimal echo or distortion
File Upload Limitations
- Maximum file size: 200MB per file
- Maximum files per upload: 1 file
- Processing time: 1-5 minutes per file (depends on length)
- File format: Must match supported formats exactly
Upload Process Details
After clicking “Upload”, the system:-
Upload Phase: File uploads to secure storage
- Progress indicator shows upload status
- Upload time depends on file size and connection speed
-
Validation Phase: System validates files
- Format verification
- Size verification
- Audio track detection (for video files)
-
Job Creation: Transcription job created
- Job ID assigned
- Status set to “PENDING”
- Job appears in jobs list
-
Processing Starts: Transcription begins automatically
- Status changes to “IN_PROGRESS”
- Real-time status updates available
- Completion notification when done
Each uploaded file creates a separate transcription job. You can upload one file at a time to create transcription jobs.
Creating YouTube Link Transcriptions
YouTube link transcription allows you to transcribe videos directly from YouTube without downloading them.When to Use YouTube Links
YouTube links are ideal for:- Public YouTube videos
- Video content you don’t have downloaded
- Online video transcription
- Quick transcription without file handling
- Videos already on YouTube
Requirements
| Field | Requirement | Validation |
|---|---|---|
| YouTube URL | Required | Valid YouTube video URL |
| Title | Required | Auto-filled from video title, editable |
| Language | Required | Select from language dropdown |
URL Validation Rules
Required Format:- Must be a valid YouTube URL
- Formats supported:
https://www.youtube.com/watch?v=VIDEO_IDhttps://youtu.be/VIDEO_IDhttps://youtube.com/watch?v=VIDEO_ID
- Private or unlisted videos (unless you have access)
- Videos with age restrictions
- Live streams (completed streams only)
- Videos longer than 2 hours (processing limitations)
Step-by-Step Process
-
Navigate to Speech to Text
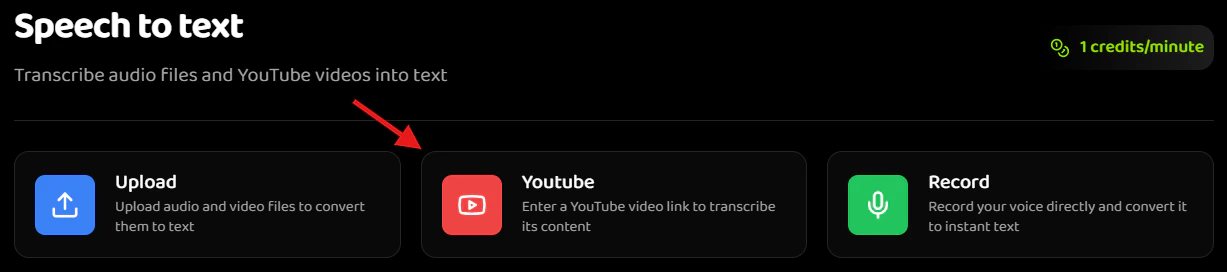
- Go to the Speech to Text section
- Click the “YouTube” button in the action buttons area

-
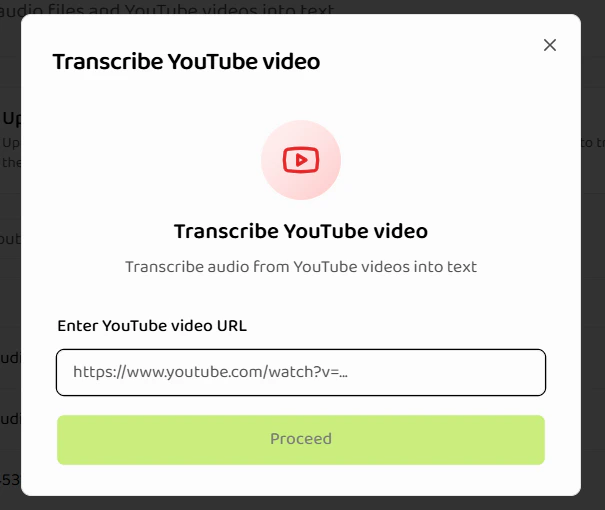
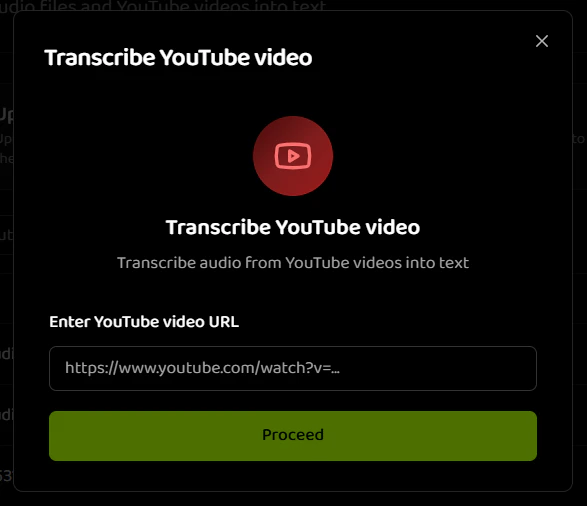
Open YouTube Modal
- The “Transcribe YouTube Video” modal opens
- You’ll see URL input field
-
Enter YouTube URL
- Paste or type the YouTube video URL
- URL validation happens in real-time
- Valid URLs show green checkmark
- Invalid URLs show error message
-
URL Validation
- System validates URL format
- Checks if video is accessible
- Retrieves video metadata
- Status indicator shows validation progress
-
Video Information
- Video title is retrieved automatically
- Title field is auto-filled
- You can edit the title if needed
-
Enter Job Details
- Title: Auto-filled from video title, can be edited
- Example: “Product Demo Video - January 2024”
- Example: “Tutorial: Getting Started Guide”
- Primary Language: Select the language spoken in the video
- Default: Arabic
- Options: Arabic, English
- Title: Auto-filled from video title, can be edited
-
Submit for Processing
- Click “Submit” button
- System extracts audio from video
- Transcription job is created
- You’re redirected to the jobs list
YouTube URL Examples
Standard YouTube URL:YouTube Processing Details
The system:- Video Access: Validates video is accessible
- Audio Extraction: Downloads and extracts audio track
- Job Creation: Creates transcription job
- Processing: Transcribes extracted audio
- Completion: Video title and metadata preserved
YouTube transcription uses the same processing pipeline as file uploads. The only difference is the source of the audio file.
Creating Live Recording Transcriptions
Live recording allows you to record audio directly in your browser and transcribe it immediately.When to Use Live Recording
Live recording is ideal for:- Quick voice notes
- Immediate transcription needs
- Testing and practice
- Interviews or conversations
- Real-time recording scenarios
Requirements
| Field | Requirement | Notes |
|---|---|---|
| Recording | Required | Minimum 30 seconds |
| Title | Required | Enter descriptive title |
| Language | Required | Select from language dropdown |
| Microphone Access | Required | Browser permission needed |
Browser Compatibility
Supported Browsers:- Chrome (recommended)
- Firefox
- Edge
- Safari (with limitations)
- Microphone access permission
- HTTPS connection (required for microphone access)
- Modern browser with MediaRecorder API support
Step-by-Step Process
-
Navigate to Speech to Text
- Go to the Speech to Text section
- Click the “Record” button in the action buttons area
-
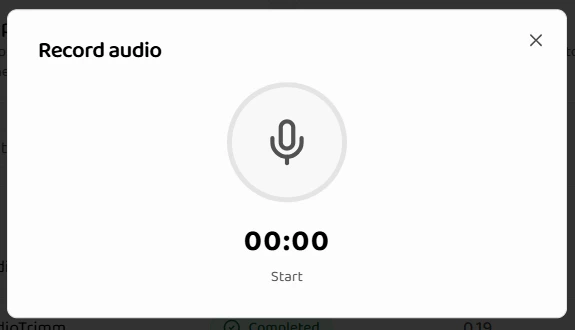
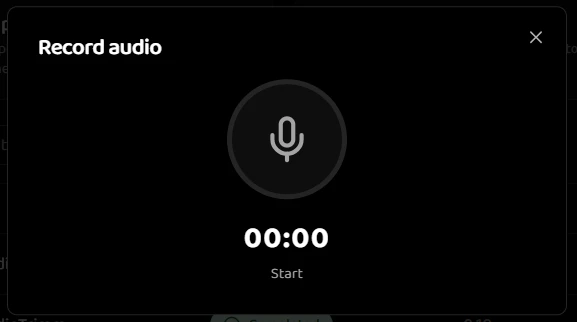
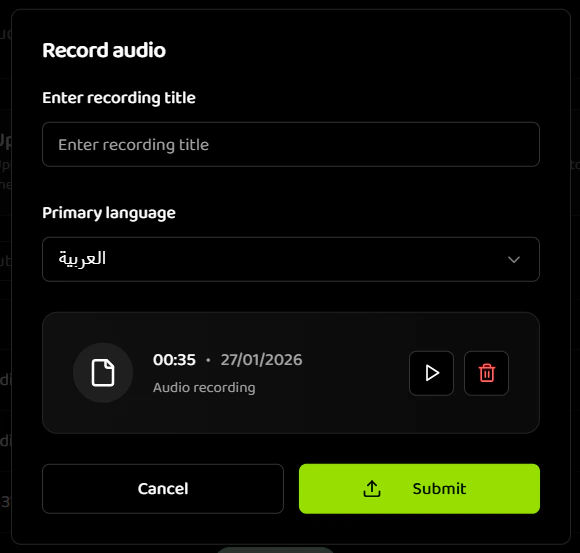
Open Record Modal
- The “Record Audio” modal opens
- You’ll see recording interface
-
Grant Microphone Permission
- Browser requests microphone access
- Click “Allow” to grant permission
- Permission is remembered for future recordings
-
Prepare for Recording
- Ensure microphone is working
- Test audio levels (visual indicator)
- Find quiet environment if possible
- Position yourself near microphone
-
Start Recording
- Click the “Record” button (microphone icon)
- Recording starts immediately
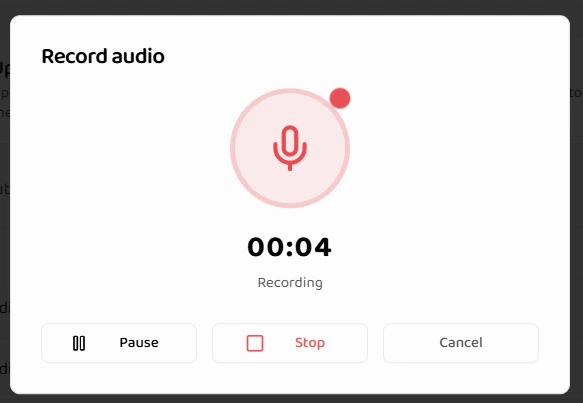
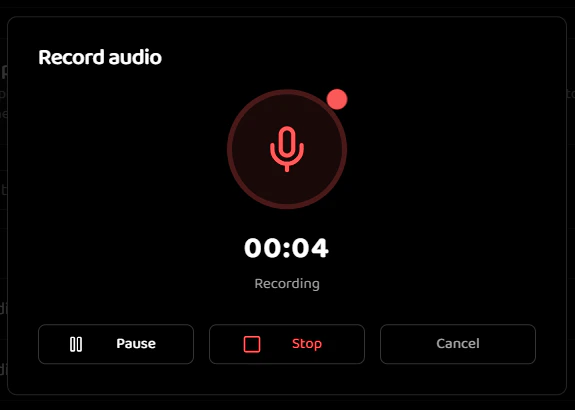
- Timer shows recording duration
- Visual indicator shows recording is active
-
During Recording
- Pause: Click pause button to temporarily stop
- Resume: Click resume to continue recording
- Stop: Click stop when finished
- Minimum recording: 30 seconds
- Maximum recommended: 2 hours
-
Stop Recording
- Click “Stop” button
- Recording is finalized
- Audio preview is available
- You can review before submitting
-
Review Recording
- Playback available to review
- Check audio quality
- Delete and re-record if needed
- Recording duration displayed
-
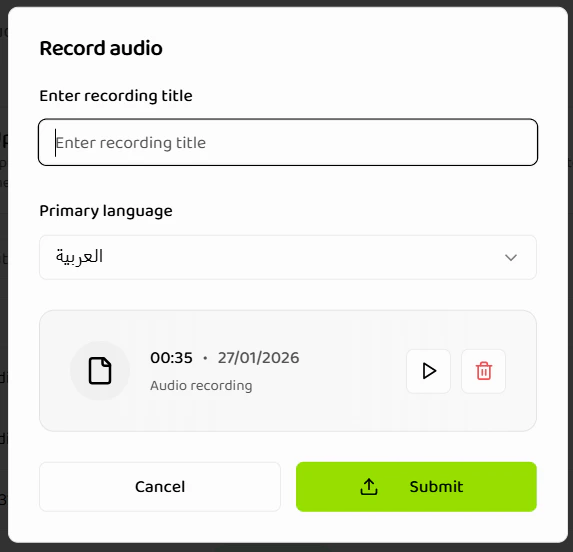
Enter Job Details
- Title: Enter descriptive title
- Example: “Voice Note - Project Ideas”
- Example: “Interview Recording - Candidate Name”
- Primary Language: Select language spoken
- Default: Arabic
- Options: Arabic, English
- Title: Enter descriptive title
-
Submit for Processing
- Click “Submit” button
- Recording is saved and uploaded
- Transcription job is created
- You’re redirected to the jobs list
Recording Controls
Record Button:- Starts recording session
- Changes to pause/stop when active
- Visual feedback (pulsing animation)
- Temporarily stops recording
- Resumes from same point
- Timer pauses during pause
- Finalizes recording
- Prepares audio for submission
- Cannot resume after stopping
- Removes current recording
- Returns to start state
- Must re-record to continue
Recording Best Practices
Environment:- Use quiet room with minimal background noise
- Close windows to reduce external noise
- Turn off notifications on devices
- Use headset microphone if available
- Speak clearly and at moderate pace
- Maintain consistent distance from microphone
- Avoid covering microphone
- Pause naturally between thoughts
- Test microphone before important recordings
- Check browser permissions
- Ensure stable internet connection
- Close unnecessary browser tabs
Recording Limitations
- Minimum duration: 30 seconds
- Maximum duration: 2 hours (recommended)
- Quality: Depends on microphone and browser
- Format: Browser-encoded audio format
- Network: Requires stable connection for upload
Language Selection
All transcription methods require selecting the primary language.Available Languages
- Arabic (default)
- English
Language Selection Guidelines
Single Language:- Select the primary language spoken
- Best accuracy when one language is dominant
- Mixed language may reduce accuracy
- System attempts automatic detection
- Manual selection recommended for accuracy
- Incorrect language selection affects quality
Selecting the correct language significantly improves transcription accuracy. Choose the language that represents the majority of spoken content.
Job Status and Processing
After creating a transcription job, it goes through these states:Processing States
| Status | Description | Duration | Actions Available |
|---|---|---|---|
| PENDING | Transcription in progress | 1-5 minutes (typical) | Wait, view progress |
| COMPLETED | Transcription finished | - | View, edit, export, delete |
| FAILED | Processing error occurred | - | View error, delete, retry |
Monitoring Job Status
Jobs List:- View all transcription jobs
- Status indicator for each job
- Sort and filter by status
- Real-time status updates
- Detailed status information
- Processing progress (if available)
- Error messages (if failed)
- Completion timestamp
Processing Time Estimates
| File Length | Estimated Processing Time |
|---|---|
| 1-5 minutes | 1-2 minutes |
| 5-15 minutes | 2-4 minutes |
| 15-30 minutes | 4-8 minutes |
| 30-60 minutes | 8-15 minutes |
| 1-2 hours | 15-30 minutes |
Validation and Error Handling
File Upload Validation
File Format Errors:- “Invalid file type” - File extension not supported
- “File too large” - Exceeds 200MB limit
- “Corrupted file” - File cannot be read
- Verify file format matches supported types
- Compress large files or split into smaller files
- Re-export corrupted files from source
YouTube URL Validation
URL Errors:- “Invalid YouTube URL” - URL format incorrect
- “Video not accessible” - Private or restricted video
- “Video too long” - Exceeds processing limits
- Verify URL format matches YouTube URL patterns
- Ensure video is publicly accessible
- Use shorter videos or split long videos
Recording Validation
Recording Errors:- “Microphone access denied” - Permission not granted
- “Recording too short” - Less than 30 seconds
- “Audio quality insufficient” - Poor recording quality
- Grant microphone permissions in browser settings
- Record for at least 30 seconds
- Improve recording environment and equipment
Processing Errors
Common Processing Errors:- “Audio extraction failed” - Cannot extract audio from video
- “Transcription failed” - Processing error occurred
- “Language detection failed” - Cannot determine language
- Check file is not corrupted
- Verify language selection is correct
- Try re-uploading with different settings
- Contact support if errors persist
Best Practices
File Organization
Naming Conventions:- Use descriptive, consistent names
- Include dates for chronological organization
- Use clear naming patterns
Content Preparation
Audio Quality:- Use clear, high-quality recordings
- Minimize background noise
- Ensure adequate volume levels
- Avoid echo and distortion
- Keep original files as backup
- Organize files before uploading
- Verify file integrity before upload
- Archive completed transcriptions
Workflow Optimization
Batch Processing:- Upload one file at a time
- Process files sequentially
- Use consistent naming for organization
- Track processing status
- Review transcriptions after completion
- Edit transcripts for accuracy
- Organize speakers properly
- Export in appropriate formats
Next Steps
After creating transcription jobs:- Managing Transcripts - Organize and manage your transcription jobs
- Speaker Management - Work with speaker separation and identification
- Export Options - Export transcripts in various formats
- Overview - Learn about Speech to Text features
Related Documentation
Managing Transcripts
Organize and manage your transcription jobs
Speaker Management
Work with speaker separation and identification
Export Options
Export transcripts in multiple formats
Overview
Learn about Speech to Text features