> ## Documentation Index
> Fetch the complete documentation index at: https://docs.tryhamsa.com/llms.txt
> Use this file to discover all available pages before exploring further.
# Creating Batch Calls
> Step-by-step guide to creating batch calls, uploading recipients, and configuring schedules
## Overview
Batch Calls can be created via the Dashboard UI or the API. This guide covers the UI creation process, including CSV upload, validation, and configuration.
## Prerequisites
Before creating an batch call, ensure you have:
* At least one Voice Agent created and configured
* At least one outbound phone number configured
* A CSV file with recipient data (at least one valid recipient)
## Basic Information
The following fields are required when creating an batch call:
### Batch Call Name
**Requirements:**
* Required field
* 1-100 characters
* Descriptive name for identification
**Examples:**
```
Good: "Q1 2024 Product Launch Batch Call"
Good: "Customer Follow-up - January 2024"
Bad: "Batch Call 1", "Test"
```
### From Number
**Requirements:**
* Required field
* Must be a configured outbound phone number
* Number must exist in your account
* Number must support outbound calling
**Selection:**
* Choose from dropdown of available numbers
* Only outbound-capable numbers are shown
* Number cannot be changed after batch call creation
### Voice Agent
**Requirements:**
* Required field
* Must be a previously created voice agent
* Agent must be configured and ready
**Selection:**
* Choose from dropdown of available agents
* Only active agents are shown
* Agent cannot be changed after batch call creation
The Voice Agent and From Number are locked after batch call creation. If you need to change them, create a new batch call.
## Upload Recipients (CSV)
Recipients are added to an batch call via CSV upload. At least one valid recipient is required to proceed.
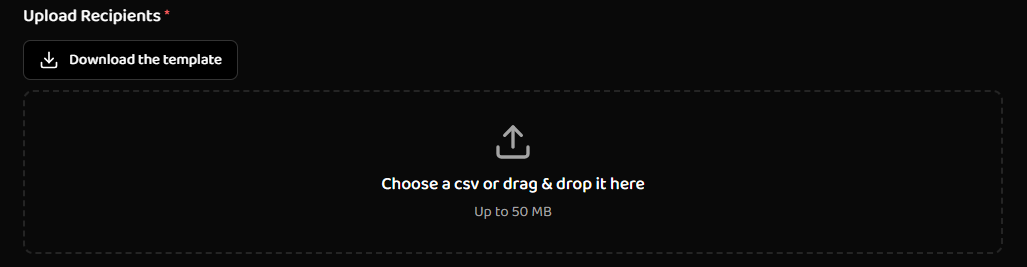
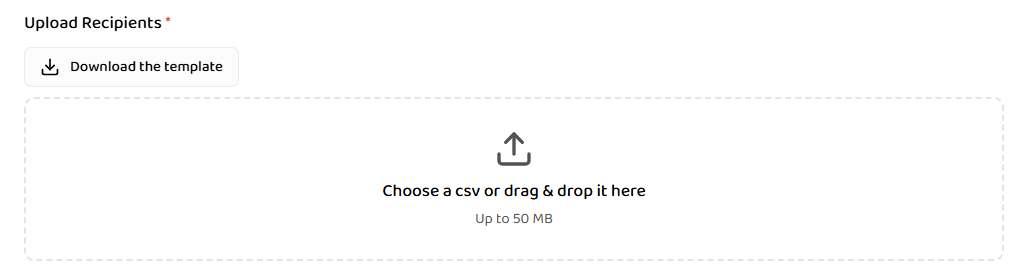 ### File Upload
**File Requirements:**
* Format: `.csv` file
* First row is treated as column headers
* No fixed file-size limit enforced at application level
* Maximum file size: 50 MB
* A downloadable CSV template is available in the UI
**Download Template:**
* Click the "Download the template" button in the Upload Recipients section
* The template includes example columns and sample data
* Use the template as a starting point to ensure proper format
* You can add or remove columns as needed (see Supported Columns below)
**Upload Process:**
1. Download the CSV template (recommended)
2. Fill in your recipient data following the template structure
3. Click "Upload CSV" or drag and drop the file into the upload area
4. File is parsed and validated
5. Validation results dialog opens automatically
6. Review accepted and rejected rows
7. Fix rejected rows if needed
8. Confirm to add recipients
The platform validates CSV structure and content automatically. Download the template from the UI to ensure proper format and avoid validation errors.
### Supported Columns
The system recognizes the following standard columns (both naming styles are supported):
| Field | Accepted Column Names | Required |
| --------------------------- | ------------------------------------------------ | -------- |
| **Phone Number** | `phoneNumber`, `phone_number` | Yes |
| **Name** | `name` | No |
| **Ignore E.164 Validation** | `ignoreE164Validation`, `ignore_e164_validation` | No |
**Dynamic Variables (External Params):**
* Any additional columns are treated as dynamic variables
* Dynamic variables have no validation
* Are passed as key-value pairs to the agent
* Are editable during validation
**Example CSV (Template Structure):**
| phone\_number | name | ignore\_e164\_validation | dynamic\_variable1 | dynamic\_variable2 |
| ------------- | ---------- | ------------------------ | ------------------ | ------------------ |
| +12025551234 | John Doe | false | value1 | value2 |
| +12025551235 | Jane Smith | false | value3 | value4 |
**Template Columns Explained:**
* `phone_number` - Required standard column (can also use `phoneNumber`)
* `name` - Optional standard column
* `ignore_e164_validation` - Optional standard column (can also use `ignoreE164Validation`). Set to `true` to skip E.164 format validation
* `dynamic_variable1`, `dynamic_variable2` - Example dynamic variable columns. You can rename these and add as many as needed
**Custom Example with Dynamic Variables:**
| phone\_number | name | plan | language | region |
| ------------- | ---- | ------- | -------- | ------ |
| +12025551234 | John | Pro | EN | US |
| +12025551235 | Jane | Basic | ES | MX |
| +12025551236 | Bob | Premium | FR | CA |
In this example:
* `phone_number` and `name` are standard columns
* `plan`, `language`, and `region` are dynamic variables (custom columns you define)
### Validation Rules
#### Phone Number (Required)
Each phone number must:
* Be present and non-empty
* Contain only digits (optional leading `+`)
* Be at least 7 digits
* Be valid E.164 format (unless `ignoreE164Validation` is set to `true`)
**Valid Examples:**
```
+12025551234
12025551234
+442071234567
```
**Invalid Examples:**
```
12345 (too short)
abc123 (contains letters)
(202) 555-1234 (invalid format)
```
#### Name
* Optional field
* No validation applied
* Can be empty
* Used for personalization if agent references it
#### ignoreE164Validation
* Optional field
* Boolean value: `true` or `false`
* Skips E.164 validation when set to `true`
* Useful for international numbers or special formats
**Example:**
| phone\_number | ignoreE164Validation |
| ------------- | -------------------- |
| 1234567890 | true |
#### Dynamic Variables
* Optional fields
* Any value accepted
* No validation applied
* Keys are fixed after upload (values can be edited)
### CSV Validation Results Dialog
After upload, a validation dialog opens automatically showing:
### File Upload
**File Requirements:**
* Format: `.csv` file
* First row is treated as column headers
* No fixed file-size limit enforced at application level
* Maximum file size: 50 MB
* A downloadable CSV template is available in the UI
**Download Template:**
* Click the "Download the template" button in the Upload Recipients section
* The template includes example columns and sample data
* Use the template as a starting point to ensure proper format
* You can add or remove columns as needed (see Supported Columns below)
**Upload Process:**
1. Download the CSV template (recommended)
2. Fill in your recipient data following the template structure
3. Click "Upload CSV" or drag and drop the file into the upload area
4. File is parsed and validated
5. Validation results dialog opens automatically
6. Review accepted and rejected rows
7. Fix rejected rows if needed
8. Confirm to add recipients
The platform validates CSV structure and content automatically. Download the template from the UI to ensure proper format and avoid validation errors.
### Supported Columns
The system recognizes the following standard columns (both naming styles are supported):
| Field | Accepted Column Names | Required |
| --------------------------- | ------------------------------------------------ | -------- |
| **Phone Number** | `phoneNumber`, `phone_number` | Yes |
| **Name** | `name` | No |
| **Ignore E.164 Validation** | `ignoreE164Validation`, `ignore_e164_validation` | No |
**Dynamic Variables (External Params):**
* Any additional columns are treated as dynamic variables
* Dynamic variables have no validation
* Are passed as key-value pairs to the agent
* Are editable during validation
**Example CSV (Template Structure):**
| phone\_number | name | ignore\_e164\_validation | dynamic\_variable1 | dynamic\_variable2 |
| ------------- | ---------- | ------------------------ | ------------------ | ------------------ |
| +12025551234 | John Doe | false | value1 | value2 |
| +12025551235 | Jane Smith | false | value3 | value4 |
**Template Columns Explained:**
* `phone_number` - Required standard column (can also use `phoneNumber`)
* `name` - Optional standard column
* `ignore_e164_validation` - Optional standard column (can also use `ignoreE164Validation`). Set to `true` to skip E.164 format validation
* `dynamic_variable1`, `dynamic_variable2` - Example dynamic variable columns. You can rename these and add as many as needed
**Custom Example with Dynamic Variables:**
| phone\_number | name | plan | language | region |
| ------------- | ---- | ------- | -------- | ------ |
| +12025551234 | John | Pro | EN | US |
| +12025551235 | Jane | Basic | ES | MX |
| +12025551236 | Bob | Premium | FR | CA |
In this example:
* `phone_number` and `name` are standard columns
* `plan`, `language`, and `region` are dynamic variables (custom columns you define)
### Validation Rules
#### Phone Number (Required)
Each phone number must:
* Be present and non-empty
* Contain only digits (optional leading `+`)
* Be at least 7 digits
* Be valid E.164 format (unless `ignoreE164Validation` is set to `true`)
**Valid Examples:**
```
+12025551234
12025551234
+442071234567
```
**Invalid Examples:**
```
12345 (too short)
abc123 (contains letters)
(202) 555-1234 (invalid format)
```
#### Name
* Optional field
* No validation applied
* Can be empty
* Used for personalization if agent references it
#### ignoreE164Validation
* Optional field
* Boolean value: `true` or `false`
* Skips E.164 validation when set to `true`
* Useful for international numbers or special formats
**Example:**
| phone\_number | ignoreE164Validation |
| ------------- | -------------------- |
| 1234567890 | true |
#### Dynamic Variables
* Optional fields
* Any value accepted
* No validation applied
* Keys are fixed after upload (values can be edited)
### CSV Validation Results Dialog
After upload, a validation dialog opens automatically showing:
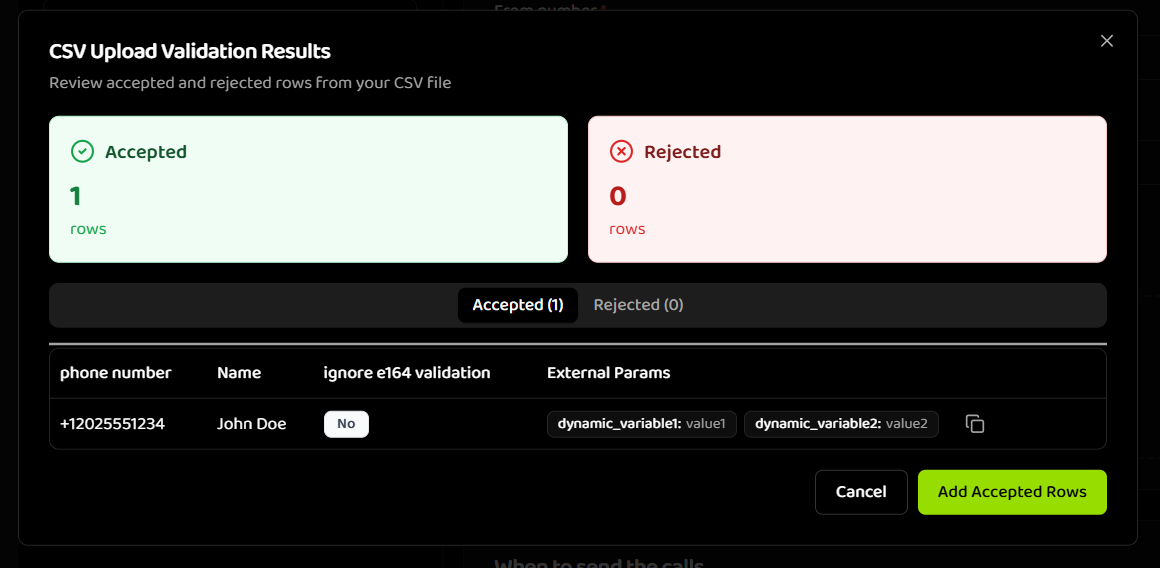
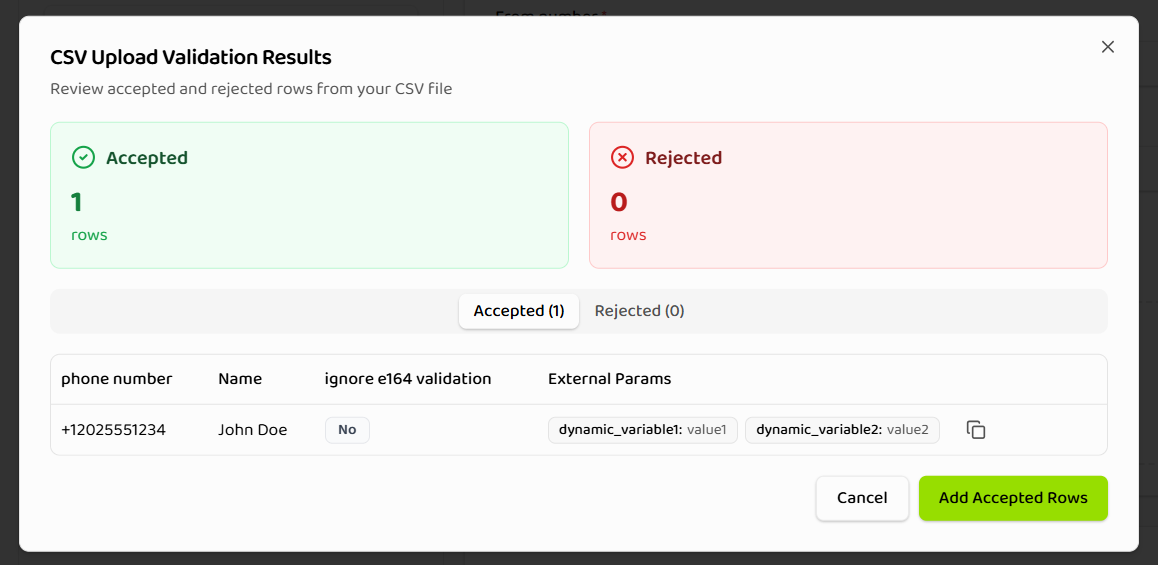 **Dialog Structure:**
The validation dialog is organized into two main sections:
1. **Summary Cards (Top):**
* **Accepted:** Green card showing count of rows that passed validation
* **Rejected:** Red card showing count of rows that failed validation
2. **Tabbed Interface:**
* **Accepted Tab:** Displays all rows that passed validation
* **Rejected Tab:** Displays all rows that failed validation with error details
**Accepted Rows Tab:**
* Shows all rows that passed all validations
* Displays phone number, name, ignore E.164 validation flag, and dynamic variables
* Rows are ready to be added to the batch call
* Count is shown in the tab label (e.g., "Accepted (1)")
**Rejected Rows Tab:**
* Shows all rows that failed one or more validations
* Displays detailed validation error messages for each field
* Each rejected row has an "Edit" button to fix errors
* Count is shown in the tab label (e.g., "Rejected (25)")
* Rows must be fixed before they can be added to the batch call
### Editing Rejected Rows
Rejected rows can be fixed using the inline editing panel:
**Editable Fields:**
* **Phone number** - Can be edited to fix validation errors
* **Name** - Can be edited or left empty
* **ignore E.164 validation** - Toggle checkbox to skip E.164 format validation
* **Dynamic variable values** - Values can be edited, but column titles (keys) are fixed and cannot be changed
Dynamic variable column titles (keys) are determined by your CSV file headers and cannot be modified in the validation dialog. Only the values can be edited. If you need different column names, update your CSV file and re-upload.
**Validation Behavior:**
* Validation runs in real-time as you edit each field
* Error messages appear immediately below invalid fields
* Success indicators appear when fields become valid
* All fields must be valid before the row can be saved
**Editing Process:**
1. Navigate to the **Rejected** tab in the validation dialog
2. Click the **"Edit"** button (pencil icon) on the rejected row you want to fix
3. An editing panel opens showing all fields for that row
4. Fix the invalid field(s) - validation runs automatically as you type
5. Review validation messages to ensure all errors are resolved
6. Click **"Save"** button (with disk icon) when all fields are valid
7. The row automatically moves to the **Accepted** tab after saving
8. Repeat for other rejected rows if needed
**After Fixing Rows:**
* Fixed rows appear in the **Accepted** tab immediately after saving
* The summary cards update to reflect the new counts
* You can continue editing other rejected rows or proceed to add all accepted rows
You must fix at least one row if all rows are rejected. The batch call cannot be created with zero valid recipients.
### Final Confirmation
Once you have fixed all rejected rows (or are satisfied with the accepted rows):
1. Review the **Accepted** tab to see all rows that will be added
2. Click **"Add Accepted Rows"** button at the bottom right of the dialog
3. All accepted rows are added to the batch call
4. Duplicate phone numbers are checked (warnings shown if duplicates exist)
5. Batch Call form is updated with the recipient count
6. Validation dialog closes automatically
You can add accepted rows even if there are still rejected rows remaining. Rejected rows that are not fixed will not be added to the batch call. You can always upload a new CSV file or create a new batch call for those recipients.
### After Adding Recipients
After clicking **"Add Accepted Rows"**, a status box appears in the Upload Recipients section showing:
**Dialog Structure:**
The validation dialog is organized into two main sections:
1. **Summary Cards (Top):**
* **Accepted:** Green card showing count of rows that passed validation
* **Rejected:** Red card showing count of rows that failed validation
2. **Tabbed Interface:**
* **Accepted Tab:** Displays all rows that passed validation
* **Rejected Tab:** Displays all rows that failed validation with error details
**Accepted Rows Tab:**
* Shows all rows that passed all validations
* Displays phone number, name, ignore E.164 validation flag, and dynamic variables
* Rows are ready to be added to the batch call
* Count is shown in the tab label (e.g., "Accepted (1)")
**Rejected Rows Tab:**
* Shows all rows that failed one or more validations
* Displays detailed validation error messages for each field
* Each rejected row has an "Edit" button to fix errors
* Count is shown in the tab label (e.g., "Rejected (25)")
* Rows must be fixed before they can be added to the batch call
### Editing Rejected Rows
Rejected rows can be fixed using the inline editing panel:
**Editable Fields:**
* **Phone number** - Can be edited to fix validation errors
* **Name** - Can be edited or left empty
* **ignore E.164 validation** - Toggle checkbox to skip E.164 format validation
* **Dynamic variable values** - Values can be edited, but column titles (keys) are fixed and cannot be changed
Dynamic variable column titles (keys) are determined by your CSV file headers and cannot be modified in the validation dialog. Only the values can be edited. If you need different column names, update your CSV file and re-upload.
**Validation Behavior:**
* Validation runs in real-time as you edit each field
* Error messages appear immediately below invalid fields
* Success indicators appear when fields become valid
* All fields must be valid before the row can be saved
**Editing Process:**
1. Navigate to the **Rejected** tab in the validation dialog
2. Click the **"Edit"** button (pencil icon) on the rejected row you want to fix
3. An editing panel opens showing all fields for that row
4. Fix the invalid field(s) - validation runs automatically as you type
5. Review validation messages to ensure all errors are resolved
6. Click **"Save"** button (with disk icon) when all fields are valid
7. The row automatically moves to the **Accepted** tab after saving
8. Repeat for other rejected rows if needed
**After Fixing Rows:**
* Fixed rows appear in the **Accepted** tab immediately after saving
* The summary cards update to reflect the new counts
* You can continue editing other rejected rows or proceed to add all accepted rows
You must fix at least one row if all rows are rejected. The batch call cannot be created with zero valid recipients.
### Final Confirmation
Once you have fixed all rejected rows (or are satisfied with the accepted rows):
1. Review the **Accepted** tab to see all rows that will be added
2. Click **"Add Accepted Rows"** button at the bottom right of the dialog
3. All accepted rows are added to the batch call
4. Duplicate phone numbers are checked (warnings shown if duplicates exist)
5. Batch Call form is updated with the recipient count
6. Validation dialog closes automatically
You can add accepted rows even if there are still rejected rows remaining. Rejected rows that are not fixed will not be added to the batch call. You can always upload a new CSV file or create a new batch call for those recipients.
### After Adding Recipients
After clicking **"Add Accepted Rows"**, a status box appears in the Upload Recipients section showing:

 **Status Box Features:**
* **Recipient count:** "You have added X recipient(s)" message with icon
* **View Recipients button:** Opens a modal to view and manage all added recipients
* **Upload Another CSV button:** Allows you to upload additional CSV files to add more recipients
**View Recipients Modal:**
Clicking **"View Recipients"** opens a modal dialog titled "Manage Recipients" that displays:
* **Table view** showing all added recipients with columns:
* Phone number
* Name
* ignore e164 validation (displayed as Yes/No)
* External Params (dynamic variables shown as tags/pills)
* **Remove action:** Each row has an 'X' icon to remove that specific recipient
* **Save button:** Shows count of recipients (e.g., "Save (1)") to confirm changes
* **Cancel button:** Closes the modal without saving changes
**Managing Recipients:**
* **Remove recipients:** Click the 'X' icon on any row to remove that recipient
* **Save changes:** Click **"Save"** to confirm removals and update the recipient count
* **Cancel:** Click **"Cancel"** to close without making changes
You can only view and remove recipients at this stage. To add more recipients, use the "Upload Another CSV" button to upload additional CSV files.
**Upload Another CSV:**
* Click **"Upload Another CSV"** to add more recipients from a new CSV file
* The same validation process applies to the new CSV file
* New recipients are added to the existing list
* Recipient count updates to reflect the total number of recipients
**Edge Cases:**
| Scenario | Behavior |
| ----------------------- | --------------------------------- |
| Empty CSV | Error shown, cannot proceed |
| Parse error | CSV parsing error shown |
| All rows rejected | User must fix at least one row |
| Duplicate phone numbers | Warning shown, duplicates allowed |
## Scheduling & Time Constraints
### Send Type
Batch Calls can be configured with two send types:
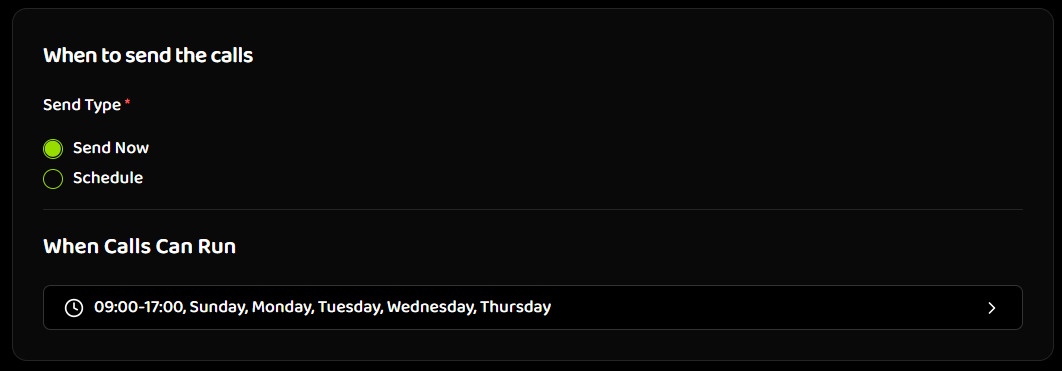
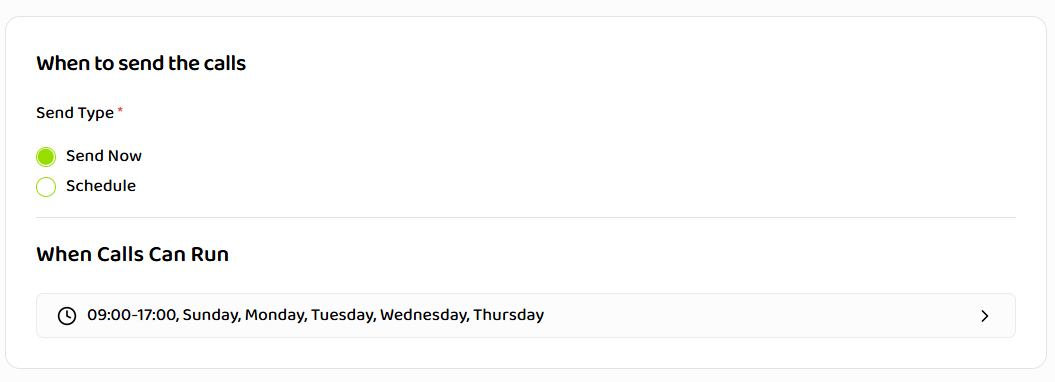
**Send Now:**
* Batch Call is created with status **SCHEDULED** (scheduled to run as soon as possible)
* No date/time selection required
* The queue and worker fetch batch calls every minute; once picked up, the batch call transitions to **RUNNING**
* Respects time range constraints
**Status Box Features:**
* **Recipient count:** "You have added X recipient(s)" message with icon
* **View Recipients button:** Opens a modal to view and manage all added recipients
* **Upload Another CSV button:** Allows you to upload additional CSV files to add more recipients
**View Recipients Modal:**
Clicking **"View Recipients"** opens a modal dialog titled "Manage Recipients" that displays:
* **Table view** showing all added recipients with columns:
* Phone number
* Name
* ignore e164 validation (displayed as Yes/No)
* External Params (dynamic variables shown as tags/pills)
* **Remove action:** Each row has an 'X' icon to remove that specific recipient
* **Save button:** Shows count of recipients (e.g., "Save (1)") to confirm changes
* **Cancel button:** Closes the modal without saving changes
**Managing Recipients:**
* **Remove recipients:** Click the 'X' icon on any row to remove that recipient
* **Save changes:** Click **"Save"** to confirm removals and update the recipient count
* **Cancel:** Click **"Cancel"** to close without making changes
You can only view and remove recipients at this stage. To add more recipients, use the "Upload Another CSV" button to upload additional CSV files.
**Upload Another CSV:**
* Click **"Upload Another CSV"** to add more recipients from a new CSV file
* The same validation process applies to the new CSV file
* New recipients are added to the existing list
* Recipient count updates to reflect the total number of recipients
**Edge Cases:**
| Scenario | Behavior |
| ----------------------- | --------------------------------- |
| Empty CSV | Error shown, cannot proceed |
| Parse error | CSV parsing error shown |
| All rows rejected | User must fix at least one row |
| Duplicate phone numbers | Warning shown, duplicates allowed |
## Scheduling & Time Constraints
### Send Type
Batch Calls can be configured with two send types:
**Send Now:**
* Batch Call is created with status **SCHEDULED** (scheduled to run as soon as possible)
* No date/time selection required
* The queue and worker fetch batch calls every minute; once picked up, the batch call transitions to **RUNNING**
* Respects time range constraints
 **Schedule:**
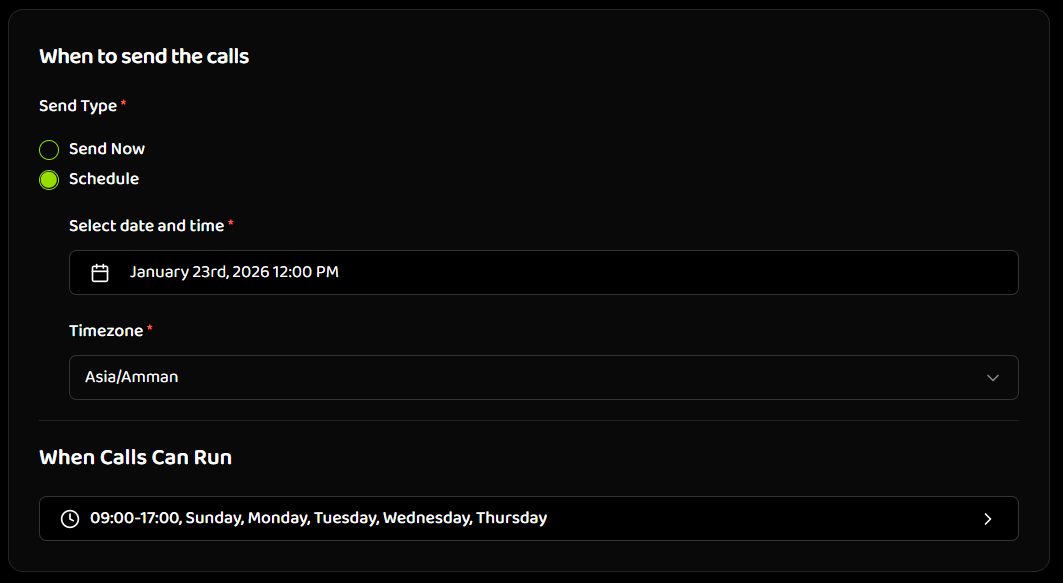
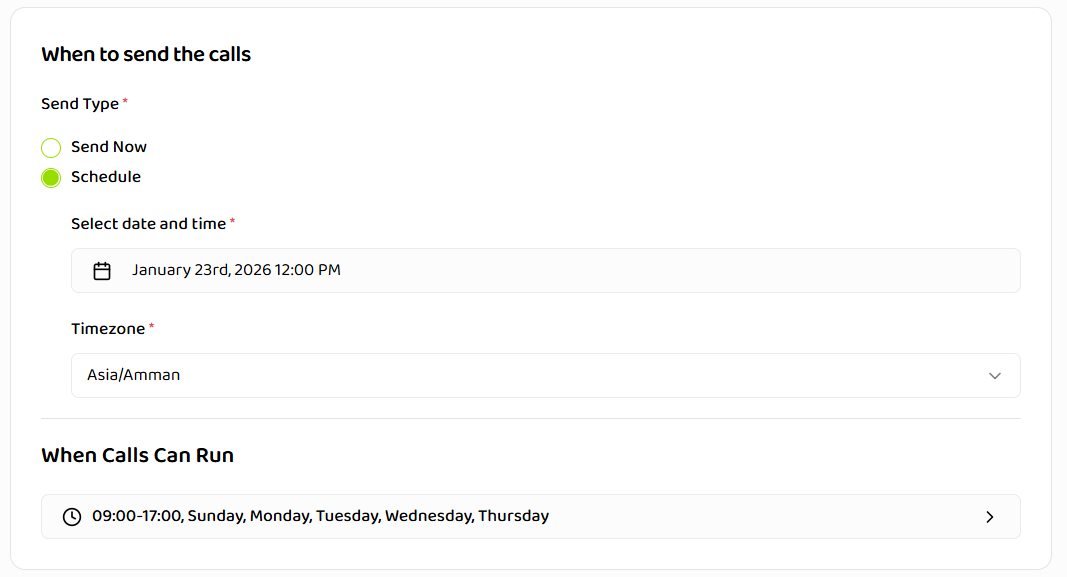
* Batch Call starts at selected date & time
* Date & time are required
* Timezone is required
* Batch Call status is SCHEDULED until start time
**Schedule:**
* Batch Call starts at selected date & time
* Date & time are required
* Timezone is required
* Batch Call status is SCHEDULED until start time
 Both **Send Now** and **Schedule** batch calls appear with SCHEDULED status at first. The queue and worker fetch batch calls every minute. When a batch call is picked up (immediately for Send Now, or at the scheduled time for Schedule), it transitions to RUNNING and begins execution.
### When Calls Can Run (Required)
All batch calls must define a time range:
**Required Settings:**
* Daily start time (e.g., 9:00 AM)
* Daily end time (e.g., 6:00 PM)
* Allowed days of the week (e.g., Monday-Friday)
**Behavior:**
* Calls outside this range are deferred, not skipped
* Batch Calls continue running but only place calls within the range
* Batch Calls cannot be created without a valid time range
**Example:**
```
Start Time: 9:00 AM
End Time: 6:00 PM
Days: Monday, Tuesday, Wednesday, Thursday, Friday
Result: Calls only placed weekdays between 9 AM and 6 PM
```
Calls scheduled outside the time range are deferred until the next valid time window. They are not skipped or lost.
## Batch Call Creation Process
### Step-by-Step
1. **Navigate to Batch Calls**
* Go to the Batch Calls section in your dashboard
* Click "Create" button
2. **Enter Basic Information**
* Enter batch call name (1-100 characters)
* Select from number (outbound phone number)
* Select voice agent
3. **Upload Recipients**
* Click "Upload CSV" or drag and drop file
* Review validation results
* Fix rejected rows if needed
* Confirm to add recipients
4. **Configure Schedule**
* Choose "Send Now" or "Schedule"
* If Schedule: Select date, time, and timezone
* Set daily start and end time
* Select allowed days of the week
5. **Review and Create**
* Review all settings
* Check recipient count
* Click "Create Batch Call"
6. **Batch Call Starts**
* If Send Now: Batch Call status is SCHEDULED until the worker picks it up (every minute); then RUNNING
* If Schedule: Batch Call status is SCHEDULED until the scheduled time; worker picks it up every minute, then RUNNING
* Monitor progress in batch call details
## Limits & Constraints
**Batch Call Creation:**
* Batch Call name: Maximum 100 characters
* Minimum recipients: 1
* CSV upload required
* Time range is mandatory
* Agent and phone number must exist
**Concurrency:**
* Governed by subscription plan
* No user management required
* Batch Calls always start
* Calls queue automatically
**CSV:**
* No fixed file-size limit
* At least one valid recipient required
* Standard columns validated
* Dynamic variables unlimited
## Next Steps
After creating a batch call:
1. **[Monitor Batch Call](./managing-batch-calls)** - Track batch call progress and status
2. **[View Recipients](./recipients-status)** - Check individual call statuses
3. **[Manage Batch Call](./managing-batch-calls)** - Pause, resume, retry, or cancel
## Related Documentation
Learn how to control and monitor batch calls
Understand recipient management and call statuses
Optimize your batch calls
Both **Send Now** and **Schedule** batch calls appear with SCHEDULED status at first. The queue and worker fetch batch calls every minute. When a batch call is picked up (immediately for Send Now, or at the scheduled time for Schedule), it transitions to RUNNING and begins execution.
### When Calls Can Run (Required)
All batch calls must define a time range:
**Required Settings:**
* Daily start time (e.g., 9:00 AM)
* Daily end time (e.g., 6:00 PM)
* Allowed days of the week (e.g., Monday-Friday)
**Behavior:**
* Calls outside this range are deferred, not skipped
* Batch Calls continue running but only place calls within the range
* Batch Calls cannot be created without a valid time range
**Example:**
```
Start Time: 9:00 AM
End Time: 6:00 PM
Days: Monday, Tuesday, Wednesday, Thursday, Friday
Result: Calls only placed weekdays between 9 AM and 6 PM
```
Calls scheduled outside the time range are deferred until the next valid time window. They are not skipped or lost.
## Batch Call Creation Process
### Step-by-Step
1. **Navigate to Batch Calls**
* Go to the Batch Calls section in your dashboard
* Click "Create" button
2. **Enter Basic Information**
* Enter batch call name (1-100 characters)
* Select from number (outbound phone number)
* Select voice agent
3. **Upload Recipients**
* Click "Upload CSV" or drag and drop file
* Review validation results
* Fix rejected rows if needed
* Confirm to add recipients
4. **Configure Schedule**
* Choose "Send Now" or "Schedule"
* If Schedule: Select date, time, and timezone
* Set daily start and end time
* Select allowed days of the week
5. **Review and Create**
* Review all settings
* Check recipient count
* Click "Create Batch Call"
6. **Batch Call Starts**
* If Send Now: Batch Call status is SCHEDULED until the worker picks it up (every minute); then RUNNING
* If Schedule: Batch Call status is SCHEDULED until the scheduled time; worker picks it up every minute, then RUNNING
* Monitor progress in batch call details
## Limits & Constraints
**Batch Call Creation:**
* Batch Call name: Maximum 100 characters
* Minimum recipients: 1
* CSV upload required
* Time range is mandatory
* Agent and phone number must exist
**Concurrency:**
* Governed by subscription plan
* No user management required
* Batch Calls always start
* Calls queue automatically
**CSV:**
* No fixed file-size limit
* At least one valid recipient required
* Standard columns validated
* Dynamic variables unlimited
## Next Steps
After creating a batch call:
1. **[Monitor Batch Call](./managing-batch-calls)** - Track batch call progress and status
2. **[View Recipients](./recipients-status)** - Check individual call statuses
3. **[Manage Batch Call](./managing-batch-calls)** - Pause, resume, retry, or cancel
## Related Documentation
Learn how to control and monitor batch calls
Understand recipient management and call statuses
Optimize your batch calls